While your dishwasher may be your most prized household appliance, did you know that if it starts leaking, it can be one of the most expensive machines there is?
High utility bills from a leaky dishwasher and insurance claims for water damage from a major dishwasher leak can cost thousands of dollars—way more than the cost of a new appliance and a serious dent in your budget.
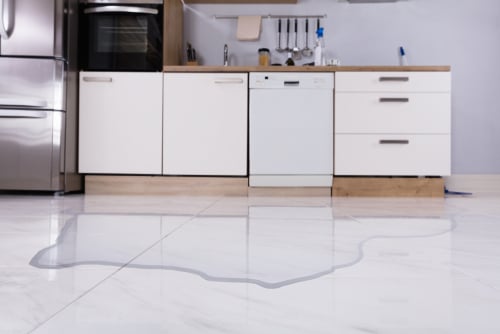
These modern-day time-savers require very little maintenance, so you may not notice right away if your dishwasher is leaking. You may mistake a little water on the kitchen floor from the sink or attribute a wet spot inside your cabinet to some excess condensation, but a little investigation could help you avoid a major catastrophe.
We've put together a list of things to check for, some of the most common problems,
and how to repair a dishwasher that's leaking on your own.
What Is The Most Common Cause Of A Dishwasher Leaking?
The most common cause of a dishwasher leaking is probably the easiest to fix. A failed gasket door seal is easy to access and relatively inexpensive to replace. A door gasket keeps the water inside your dishwasher and is typically made from soft vinyl or rubber.
After years of use, it can become brittle and crack or rip.
Food particles and soap residue build-up can contribute to this problem.
Extend the life of your door gasket by regular cleaning to wipe away foreign substances.
 Why Is My Dishwasher Leaking?
 Dishwasher leaks usually come from a few places—around the door, under the appliance,
or where it connects to a drain.
Water leaks around the door could be from a faulty gasket, broken door latch, or stuck float.
A water leak from under the dishwasher could mean you’ve got a pump, hose, or water inlet problem on your hands.
Once you've determined the source of the leak, you may want to tackle the job yourself.
Some issues are easy to replace on your own, whereas others require the help of a
trained professional.

Faulty Door Gasket
-jpg.jpeg?width=739&name=shutterstock_2023557110%20(1)-jpg.jpeg)
The door gasket keeps the water inside your dishwasher and is typically made from soft vinyl or rubber. After years of use, it can become brittle and crack or break.
Take a look and run your hand along the entire gasket to find any signs of damage.
How to Fix It:
- Locate the door gasket—open the door and look for a soft rubber seal that is at
the top and sides of the dishwasher. - Take out the bottom rack for easier access.
- Remove the gasket—use a pair of needle-nose pliers to pull the old gasket
out of the recessed channel. - Clean the channel—use a paper towel or cloth to make sure there is no debris
left in the channel. - Install the new gasket—starting at the top center of the machine, press the center
of the gasket into the channel. You should have equal amounts hanging down to fit both sides. Install the top, then one side of the dishwasher tub, then the other side. Heat the new gasket with a hair dryer to make it more pliable, if needed. - Trim Excess—only 3-4” of the gasket should stick out from the channel on each side.
Use a utility knife to trim away any extra seal. - Replace the rack—line the rack up with rollers on the bottom of the tub.
- Close and lock the door—keep the door closed for a minimum of three hours
to make sure the gasket fits the door. - Run the dishwasher—check the door and floor for moisture or leaks.
Warnings/Cautions: Take note of the proper orientation of the old gasket so you can install
the new one with the proper side out.
Loose or Cracked Drain Hose
-jpg.jpeg?width=735&name=shutterstock_1394343899%20(2)-jpg.jpeg)
Wastewater from your dishwasher is removed through a drain hose underneath the appliance.
The hose runs from the drain pump to the drain line, and then to the sink drain.
The hose connections can loosen over time or crack causing dishwasher leaks.
Look under the unit while the cycle is running and check for water leaks at the clamps or
anywhere on the hose.
How to Fix It:
- Disconnect the power to prevent electrical shock.
- Tighten any loose connections at the ends of the drain hose. Use an adjustable wrench or pliers to make sure everything is snug. You can also remove the fittings and reconnect the hose clamps. This should seal the end from water leaks.
- Replace the hose—place a pan under the hose to catch any water that may escape from inside the hose. Remove the hose clamps from the pump and sink drain and pull the hose free. Install a new hose (available at a home improvement or hardware center) by replacing the clamps on both ends.
- Replace the access panel and reconnect the power.
Warnings/Cautions: Always be sure to disconnect the power source before working on the internal parts of your dishwasher.
Faulty Water Inlet Valve
The water inlet valve can cause leaks when it doesn’t close properly.
The part is generally found at the bottom of the dishwasher tub and regulates the amount
of water during the wash cycle. If this part fails to close, the dishwasher can overfill and leak out.
If you open the door mid-cycle and that water continues to fill with water, your inlet valve is probably the problem and needs to be replaced.
How to Fix It:
- Disconnect the power to prevent electrical shock and water supply to stop water from leaking
- The inlet valve cannot be repaired. Order a new one that meets the manufacturer’s replacement parts list.
- Remove the kickplate, hose, screws, and clamp that you’ll find attached to the water inlet valve.
- Carefully remove the solenoid wires one at a time. These provide the power to operate the valve. Label the wires for easier reconnection.
- Remove the old part, replace with a new valve and reattach connections.
- Replace the kickplate, reconnect the water supply and the electricity.
Warnings/Cautions: Recognize your repair limitations. If this project seems beyond your capabilities, contact a professional repair service.
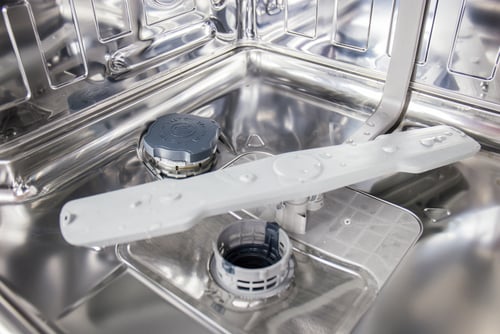
Clogged Filter
 dishwasher’s main job is to remove dirt and food particles from your dishes. The filter’s job is to trap large food particles that could damage the drain pump if flushed down the drain. If the filter hasn’t been cleaned at regular intervals, food particles will accumulate, the water won’t drain properly, and will leak through the front.
How to Fix It:
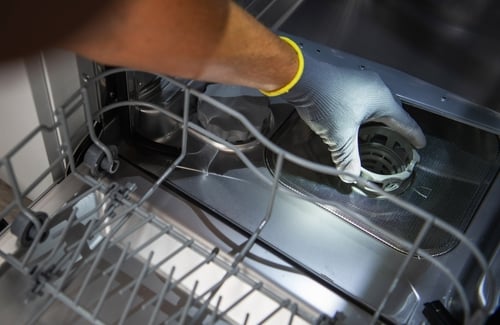
- Remove the lower dishwasher rack and locate the filter on the bottom of the tub.
- Your dishwasher may have a triple filter system with an upper and lower assembly. Turn the upper filter counterclockwise to remove it, then lift the lower filter out.
- Rinse the filters under warm water or soak for a few minutes to remove food particles and residue.
- Use a soft brush to gently remove calcium deposits.
- Reinstall the lower filter under tabs to ensure the upper filter will line up properly. Place the upper filter in the opening and turn it clockwise to lock it into position.
- Line up the roller wheels and replace the lower rack.
Warnings/Cautions: To keep your dishwasher working efficiently and avoiding leaks, clean your filter every three to six months.
Broken Water Pump System
The water pump system is a crucial component to your dishwasher’s operation. It delivers water to and from the machine, and if the pump is malfunctioning or broken, it can cause dishwasher leaks down the sides and out the bottom. If no water is entering the inside of your dishwasher but is leaking onto the floor, your water pump likely needs to be replaced.
How to Fix It:
- Disconnect electrical power.
- Remove the outer door panel, you’ll need to unscrew the inner door panel. Support the door to prevent it from falling to the ground.
- Separate the inner panel from the outer door panel and control panel. Disconnect the wires from the control panel and pull the door away from the dishwasher.
- Remove screws holding the bottom front access and toe panel to the machine.
- Use pliers to remove the drain hose and wire harness connected to the drain pump.
- Disconnect the drain pump by pushing down on the locking tab and rotating the pump counterclockwise ¼ turn. You’ll want to use a towel to soak up any water that leaks out of the pump.
- Install the new drain pump by first lubricating the O-ring with rinse aid. This will help prevent future leaks. Place the new pump in the sump opening and turn it clockwise ¼ turn and snap it into place
- Reconnect the wire harness, drain hose (secure the hose with the wire clamp.)
- Replace the access and toe panels. Reinstall the door and control panels and reconnect the user interface wire harness. Screw everything back together and reconnect the electrical power.
Warnings/Cautions: This project can be dangerous if you don’t have the proper tools and expertise. Consider contacting a qualified service technician to handle this job. This will also provide a guarantee that your leaky dishwasher will be repaired correctly.
Faulty Door Latch
The dishwasher door latch secures the door to create a watertight seal to prevent leaks and allow activation of the machine. The latch can loosen over time or move out of alignment and cause water leaks.
How to Fix It:
- Disconnect electrical power and turn off the water supply.
- Open the door, unscrew the inner door panel to access the latch assembly
(behind the control panel.) - Activate the catch/latch assembly to see if it lines up and activates the two switches. You can use a multimeter to check for continuity.
- If the latch is misaligned, reposition and tighten screws. Retest the function.
- If the door latch is visibly broken or does not have continuity, it will need to be replaced.
- Disconnect the two wires (labeling the proper location for reassembly) and
unscrew the latch. - Install a new assembly, reconnect the wires, replace the control panel
and front door panel. - Reconnect the electricity and water supply.
Warnings/Cautions: Before taking on this repair, look for simple reasons for why the door is not latching properly. Check for obstructions like a utensil caught in the door or the rack is not properly positioned inside the dishwasher.
Wrong Detergents
This might seem like a simple concept, but it’s important to only use detergents specifically made for dishwashers. Using regular dish soap will create too many bubbles and will cause leaks. Another contact point might be from rinsing dishes with regular dish soap prior to running them through the machine. Leftover solution can foam up and cause a leaky dishwasher.
Warnings/Cautions: Always follow manufacturer’s instructions for using your dishwasher. Avoid rinsing dishes prior to washing. Today’s machines and detergents are most efficient when there is some dirt and residue to clean.
Cracked Hoses or Faulty Valves
-jpg.jpeg?width=757&name=shutterstock_1394343899%20(1)-jpg.jpeg)
If your dishwasher is leaking from underneath, it’s possible you could have a loose hose connection, corrosion, or a faulty solenoid valve. Hoses should also be checked for blockage and cleared to resolve water leaks.
How to Fix It:
- Unplug the power supply and turn off the water.
- Take the toe kick off to check the water inlet valve, drain hose, recirculation hose, and all other parts for water.
- Look for any splits or cracks in hoses or loose hose clamps. Replace any damaged hoses, adjust or replace hose clamps.
- Look for loose connections and tighten as needed.
- If you suspect there is a blockage in the drain hose, disconnect the hose from the pump by removing the hose clamp and twisting it loose. Run water through the drain hose (and recirculation hose) to clear any built-up debris.
- Reconnect the hoses, replace the clamps, replace the toe kick, and restore both the power and water supply.
Warnings/Cautions: While drain hose issues can cause leaking, the recirculation hose may not properly rinse dishes and leave residue behind.
Damaged Water Pump Gasket
-jpg.jpeg?width=758&name=shutterstock_1241943781%20(1)-jpg.jpeg)
The main purpose of the pump gasket is to prevent leaks between the pump and filter housing. This seal can dry out after years of use and exposure to harsh dishwasher detergents. This can lead to cracks and water leaks.
How to Fix It:
- Safety first—disconnect the power supply and turn off the water.
- Open the door and remove both dish racks.
- Lift the lower spray rack out of the dishwasher.
- Remove screws near the base of the water guide tube and release the clip. You can now pull the water guide off the mounting brackets and filter assembly.
- Take out screws holding the filter assembly to the tub. Lift the filter assembly
out and take the old pump gasket off. Install the new gasket. - Reinstall the housing with screws, insert the water guide, and lock into place.
Reconnect the tube to the mounting brackets and retaining clip. - Push the lower wash arm back into place and test to ensure it spins freely. Replace the dish racks and close the door.
- Turn the power and water back on.
Warnings/Cautions: The complicated process of disassembling and reassembling the dishwasher to access the pump gasket, may be beyond your DIY skill level. Contact a qualified dishwasher service technician to provide peace of mind that your leaky dishwasher will be repaired and working properly.
Issue in Float Switch
The water level inside your dishwasher is controlled by a float. Turn off the machine mid-cycle and open the door. If the water level is above the heating element, it could overflow, and the float may be stuck or defective.
How to Fix It:
- Turn off the water and electric circuit to your dishwasher before repairing or replacing the parts listed below.
- Open the door and pull out the lower dish rack. Remove the float assembly cover.
- Test the float movement by lifting it up and down. It should move freely. Look for any debris that may be obstructing it and clean the area.
- If there is no debris and the float seems stuck or broken, you’ll want to replace it. Just pull out the old float and push on the new one, replace the float cover, dish rack and reconnect the power and water.
Warnings/Cautions: If your float is attached to the switch, you will need to access it through the lower kick plate panel.
How Do You Fix a Leaky Dishwasher?
Looking for the Leak
Dishwasher leaks aren’t just an inconvenience, they can also cause a lot of damage as well as create an unhealthy environment with mold and mildew growth. Before you panic, you can narrow down the reasons by identifying where the leak is most prevalent.
Dishwasher Leaking From Bottom
Experts have broken down the most common reasons for a dishwasher that’s leaking from the bottom and onto the floor:
- Faulty Water Inlet Valve
- Clogged Filter
- Leaking Door Panel Seal
- Broken Water Pump System
- Damaged or Loose Hoses
Dishwasher Leaking from Front
Before you run to the appliance store to buy a replacement for your leaky dishwasher, check out these most common reasons for determining what is causing your dishwasher to leak
through the front:
- Damaged Door Gasket
- Blocked Dishwasher Air Gap
- Clogged Drain
- Clogged Filter
- Unlevel Dishwasher
Troubleshooting the Problem
While it’s not as common, occasionally a dishwasher will start leaking even when it’s not running. This can be a little more difficult to diagnose. There are a few issues that may solve the problem such as water backflow or water inlet valve. The inlet valve may be stuck open due to a calcium build-up. You could also have a drain hose problem. It might be laying flat underneath the sink that slowly lets water back into the dishwasher until it overflows and leaks. Hang the drain hose above the drain line to correct this problem.
Repairing the Dishwasher
Fix The Leaky Dishwasher Yourself vs Seek Professional Support
Repairing your leaky dishwasher may save time and money if you have the tools and skills needed to handle the repair. Unfortunately, there are some projects that are more complicated or difficult to repair that should be done by a professional. Let’s take a brief look at the cases and see who will be best suited to handle the job.
|
Fix It Yourself |
Seek Professional Support |
|
1. Clogged Filter |
1. Faulty Water Inlet Valve |
|
2. Faulty Door Gasket/Latch |
2. Broken Water Pump System |
|
3. Wrong Detergents |
3. Faulty Valves |
|
4. Replace Float Switch |
4 Damaged Water Pump Seal |
Puls—Professional Dishwasher Repair You Can Trust
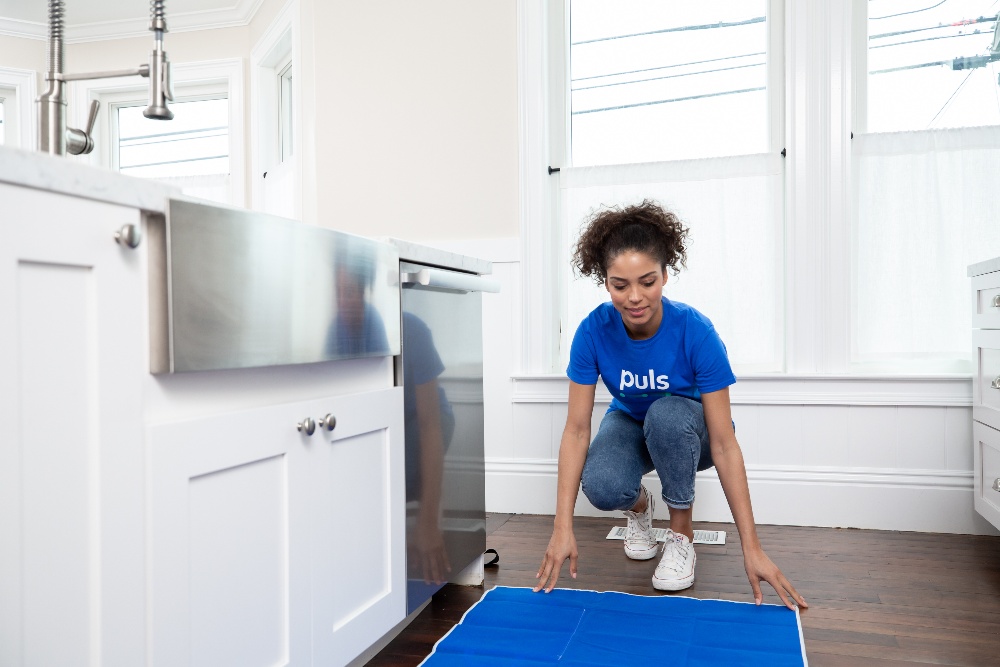
Whether you're nervous about repairing your leaky dishwasher or lack the skills needed to handle the job, Puls is ready to help you fix it quickly and conveniently.
All our technicians are skilled to troubleshoot the problem and experienced with all makes and models. For a low $89 diagnostic fee, an in-house evaluation will identify the problem and provide a fast, accurate repair quote. Appliance repairs start at just $139 and our diagnostic fee is waived entirely when you proceed with our recommended repair.
Same day appointments can be scheduled with just a few clicks online. For a limited time only, you can save 5% when you book online with the code: APR5.
We take pride in every appliance repair and earn your trust with our 90-day guarantee on all parts and labor. That means we'll be back to fix anything else that goes wrong free of charge.
So, what are you waiting for? Book an appointment today so you can rest easy with a dishwasher that’s like new before you know it.