
If you’re looking to perform a ceiling fan installation of your own, or replace an existing ceiling fan, there’s good news: it isn’t as hard as it looks, and can make for a satisfying DIY project if you’ve got a spare afternoon.
Just follow this handy guide. We’ll show you how to install a ceiling fan yourself, and throw in a few bonus tips and pointers to boot.

Tools You’ll Need to Install a Ceiling Fan
You just need a few basic tools to complete your ceiling fan installation:
- Flat-head and a Philips head screwdriver
- Wire snips/strippers
- Circuit tester or Voltage Meter
- Adjustable wrench/pliers
- Electric or Cordless Drill with various length bits
- Electrical tape
- Safety glasses and dust mask
- Step ladder
Materials Required to Install a Ceiling Fan
You’ll need to purchase a few things before you start your project. In most cases, all of these components will be included in the box with the fan. It’s always a good idea to make sure all the parts are included before you climb that step ladder.
- Ceiling Fan
- Ceiling Fan Light Kit (if you plan to use one)
- Downrod (or more than one if you’re installing in a cathedral or high ceiling area)
- Mounting Hardware
- Wire Connectors
Learn About the Ceiling Fan Parts Before Installing
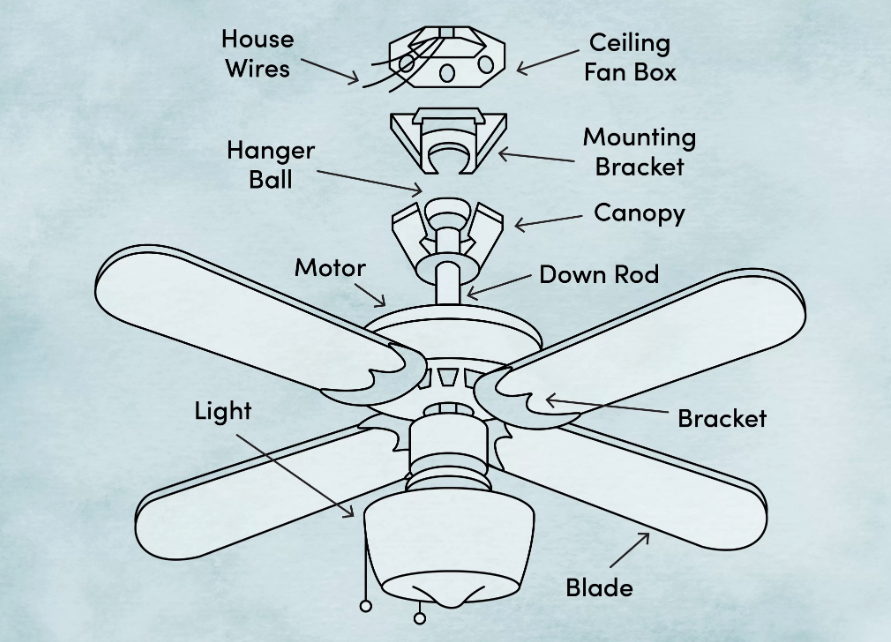 Image via Wayfair.com
There are a few components you need to get familiar with before beginning your ceiling fan installation.
- The electric box is a metal housing in the ceiling that contains all the wiring for your ceiling fan. If there was an existing ceiling fan in place prior to your current installation, it should also already be braced to hold the weight of your fan—though it’s important to verify this for safety.
- The bracket is the metal piece that holds the ceiling fan in place. The electric box stays inside the ceiling, while the bracket is connected to it from below the ceiling line.
- The motor drives the fan, and also serves as the hub for the light and fan on/off switches
- The cowl is a metal covering that goes over the motor and bracket for aesthetics
- The light kit contains the light bulb sockets, and is connected to the motor via two or three simple wires
Installation Safety Rules
Before you start your project, it’s important to turn off the power at the circuit box to ensure there is no electricity flowing through the lines. Even if you’re a seasoned electrician, it’s critical that you reduce the risk of electrocution with this simple task.
There are also a few things more things you’ll want to understand to ensure no one will get hurt and any property damage is avoided. Here are some details about the fan you’re using, the blade spacing, and the space you’re installing it in. There’s nothing worse than getting half way through your project and realizing that it’s not going to work, or worse, risk personal or property damage if the blades dislodge and become airborn.
- There must be at least 8-10 inches between the blades of the ceiling fan and the ceiling.
- You must also maintain an 18-inch clearance between the blades and the walls, or any other obstruction.
- Ceiling fan blades must be hung at least 7-feet above the floor, and the fan does its best if hung at least 8-9 feet up.
- If the ceiling is quite high, or if the fan is being installed on a sloped ceiling, a longer down-rod might be necessary so the blades don’t scrape the ceiling and the fan keeps its efficacy.
How to Install a Ceiling Fan
 First, before performing any electrical repair or installation, always shut the power off at the circuit breaker in order to avoid the risk of electric shock.
- If you have an electrical tester, you can use it before beginning the appliances installation to ensure that the power is definitely turned off at the breaker.
- First, attach the bracket to the electric box via the two or more long screws. Instead of tightening the screws all the way, make sure they are screwed in enough to hold the bracket securely, but leave a couple inches leeway so that you can connect the wiring in the following steps.
- The motor should come pre-assembled, but if it does not, follow the manufacturer’s instructions to put it together before proceeding.
Tip: So that you don’t have to support the fan motor yourself during the entire installation, the manufacturer likely included a hook or hanger in the design. Attach the hanger to the bracket, and then hang the motor to it from one side. The motor will hang down, making it close enough for you to attach the wiring, but also leaving the electric box and bracket partially exposed for the wiring to be attached. - Hang the motor from the hanging attachment, and begin connecting the wiring. Connect the wires from the motor to the corresponding wires in the electrical box. The black wire goes with black, the white wire with white, and the green with green. If there is a red wire coming from the electric housing, connect the blue wire to it. Otherwise, connect twist the blue and black wires that are coming from the motor together, and attach the two of them to the black wire in the electric box.
- The blue wire is for the light, the black wire for the fan, the white is the common wire, and the green is the grounding wire. In older homes, there is just one wall switch for the light and fan, which is why there may only be one wire – the black wire – for both. Newer homes may include a red wire so that the fan and light can be operated independently.
Tip: Twist the wires together lightly to connect them. Then, put the wire nut over them and use that to do most of the twisting. This is easier and more comfortable. - Once the wires are connected, push them all into the metal electric box. This may take a bit of finagling.
- Now, tighten those screws on the bracket to bring it up flush with the ceiling.
- Swing the motor up and hold it in place while screwing in the screws to secure it to the bracket.
- Put the cowl on over the motor and bracket. The assembly below the motor, to which the light kit will soon be attached, will remain exposed.
- Attach the fan blades to the bottom part of the motor, which will also be exposed inside the cowl. These are attached by simple screws.
Tip: Pre-assemble the fan blades before starting installation so they are ready at hand. - Connect the light kit. It may look like there’s a whole mess of wiring coming out from the motor, but don’t panic. A circular cardboard cover keeps most of that wiring in place above, with just two wires – blue and white – coming through the hole in the middle of the cover.
- Clip the wires from the light kit to the wires that come through the cardboard circle – black goes to blue, and white goes to white.
- Push all the wiring up below the cardboard circle as you did with the electric box, and attach the light kit to the motor.
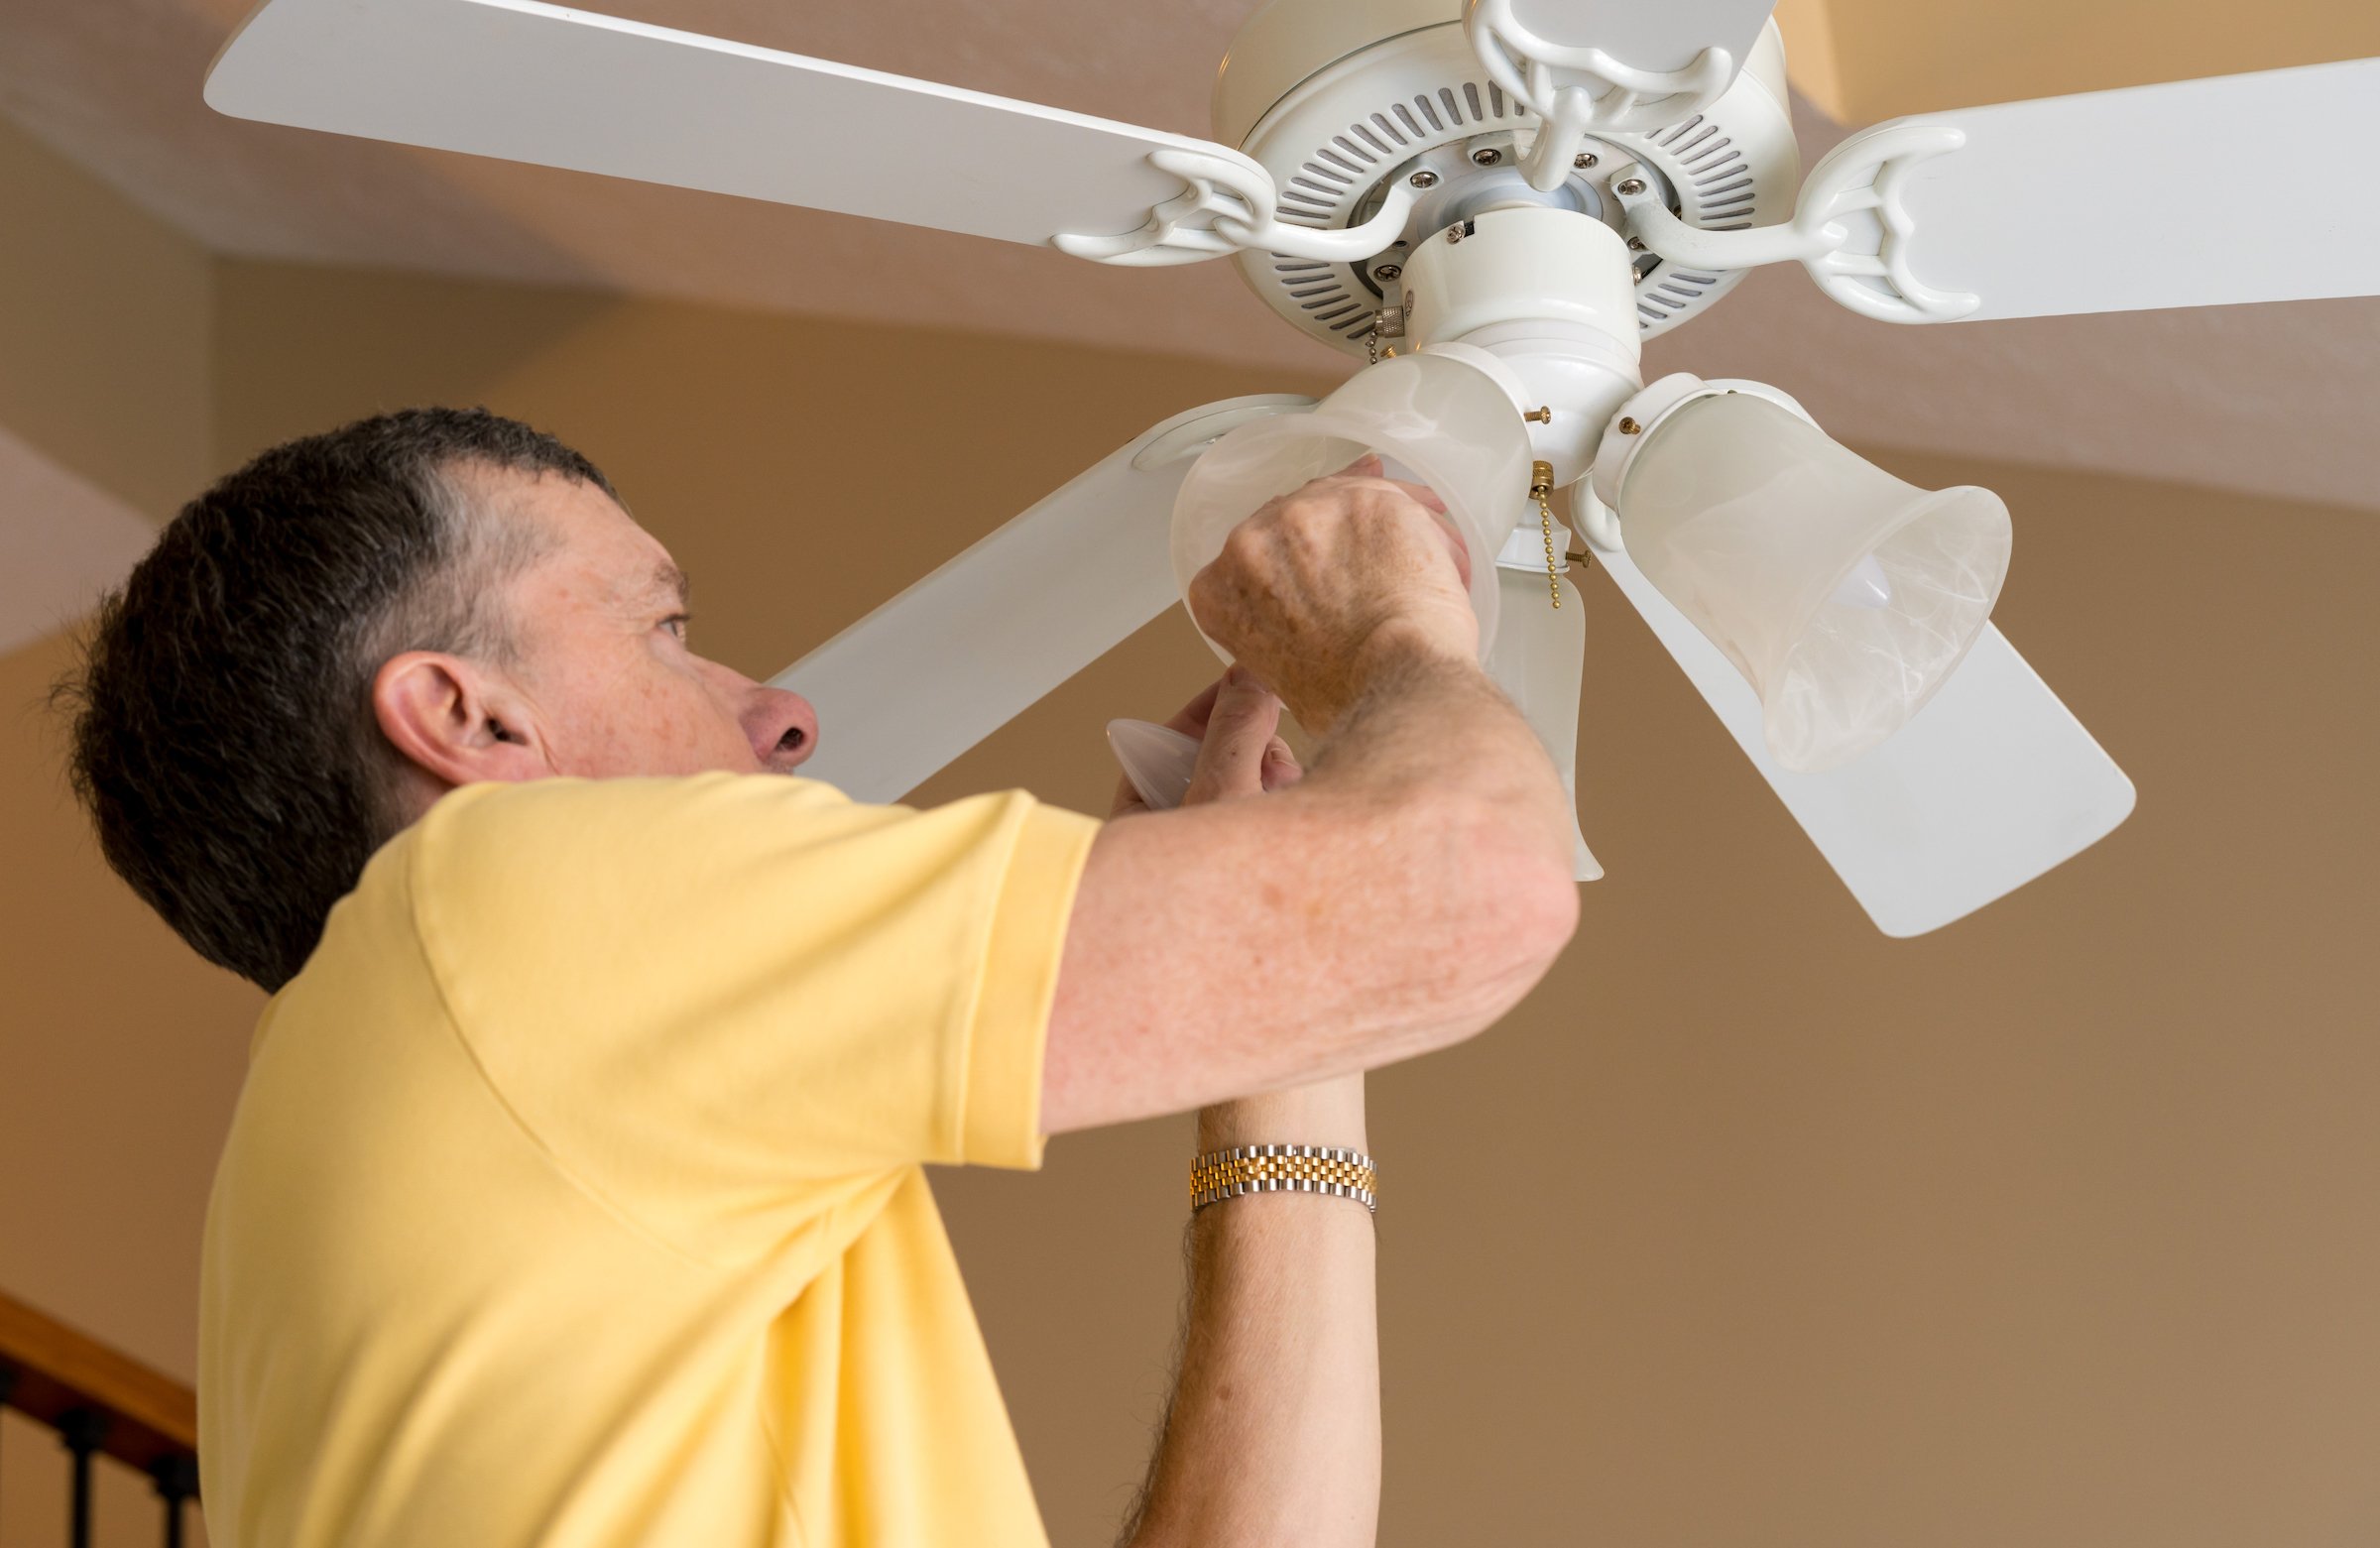
- Install your light bulbs and any lighting cover that may be included, and test your new ceiling fan.
FAQs
What’s the best ceiling fan size?
Fan size is determined by the room’s overall size. Use a 42-inch fan for rooms up to 144 square feet. Use a 44-inch fan for rooms 225 square feet. Use a 54-inch fan for a room that’s 400 square feet. Rooms larger than 400 square feet will require several fans.
Which fan blade works the best?
You must choose fan blades that fit the room but the larger the blades, the better. They will displace more air at slow speeds than smaller blades can. A curved blade design is the most efficient and can move high volumes of air.
Can a ceiling fan help with heating in the winter?
Yes, change the fan to turn clockwise. This will enhance heating by pushing hot air from the ceiling and circulating it down to make the room more comfortable.
What kind of accessories can you get with a ceiling fan?
There aren’t a lot of accessory options but a variety of light kits can be added to fans—many come with glass or stylish globes. Some use a remote control for a streamlined look (no more pull chains) and an effective way to control a fan in a high ceiling. Newer model smart fans can be connected to a home network and controlled through a smart phone app.
How do you mount a fan in different ceiling heights?
Standard ceiling heights of 7-foot 6-inches or more common today, 8-foot, require a flush mount model. Taller 9-foot ceilings and higher cathedral ceilings call for one or two downrods to maintain the proper level for efficiency and appearance.
The Bottom Line
Ceiling fans are an efficient way to circulate air to keep rooms cool in the summer months and warm in the winter months. Following this step-by-step guide can help save you time and money. Install your fan to add to your room’s decor while making the space more comfortable.
DIY Not Your Thing? Puls is Here to Help
If you’re looking for a reliable handyman for ceiling fan installation, you’re in luck. Puls technicians can take care of your ceiling fan installation while you kick back with an ice cold lemonade. We’ll worry about clearance, height, placement, or weight support.
All you have to do is book a slot in moments, and our technician can be at your door as soon as the same day.
And of course, all of our parts and labor are covered by our trademark quality guarantee. Save yourself some cash, and some energy, and book a fan installation time slot now.

