
A Nest camera is a great addition to any home security setup – in fact, with its high-quality streaming video, ability to know when a person is in its field of vision, and potential to focus in on high-activity zones, the Nest camera might be the home security centerpiece.
After all, we’re big fans of the kind of smart home technology that’s accessible anywhere via your smartphone, and that’s exactly what the Nest camera does best. You can even customize notifications, so you can get updates and check in on your home in real time – no matter where you happen to be.
But before you can reap all of the security benefits, first you’ve got to take care of your Nest camera installation. Worry not – with our Nest camera installation guide, we’ll walk you through all the steps to get your Nest camera up and running – whether it’s indoors or out.
Outdoor Nest Camera Installation
 Photo Credit: Walmart
Before you begin your outdoor Nest camera installation, you’re going to want to set up and connect the Nest camera to the Nest app while you’re indoors.
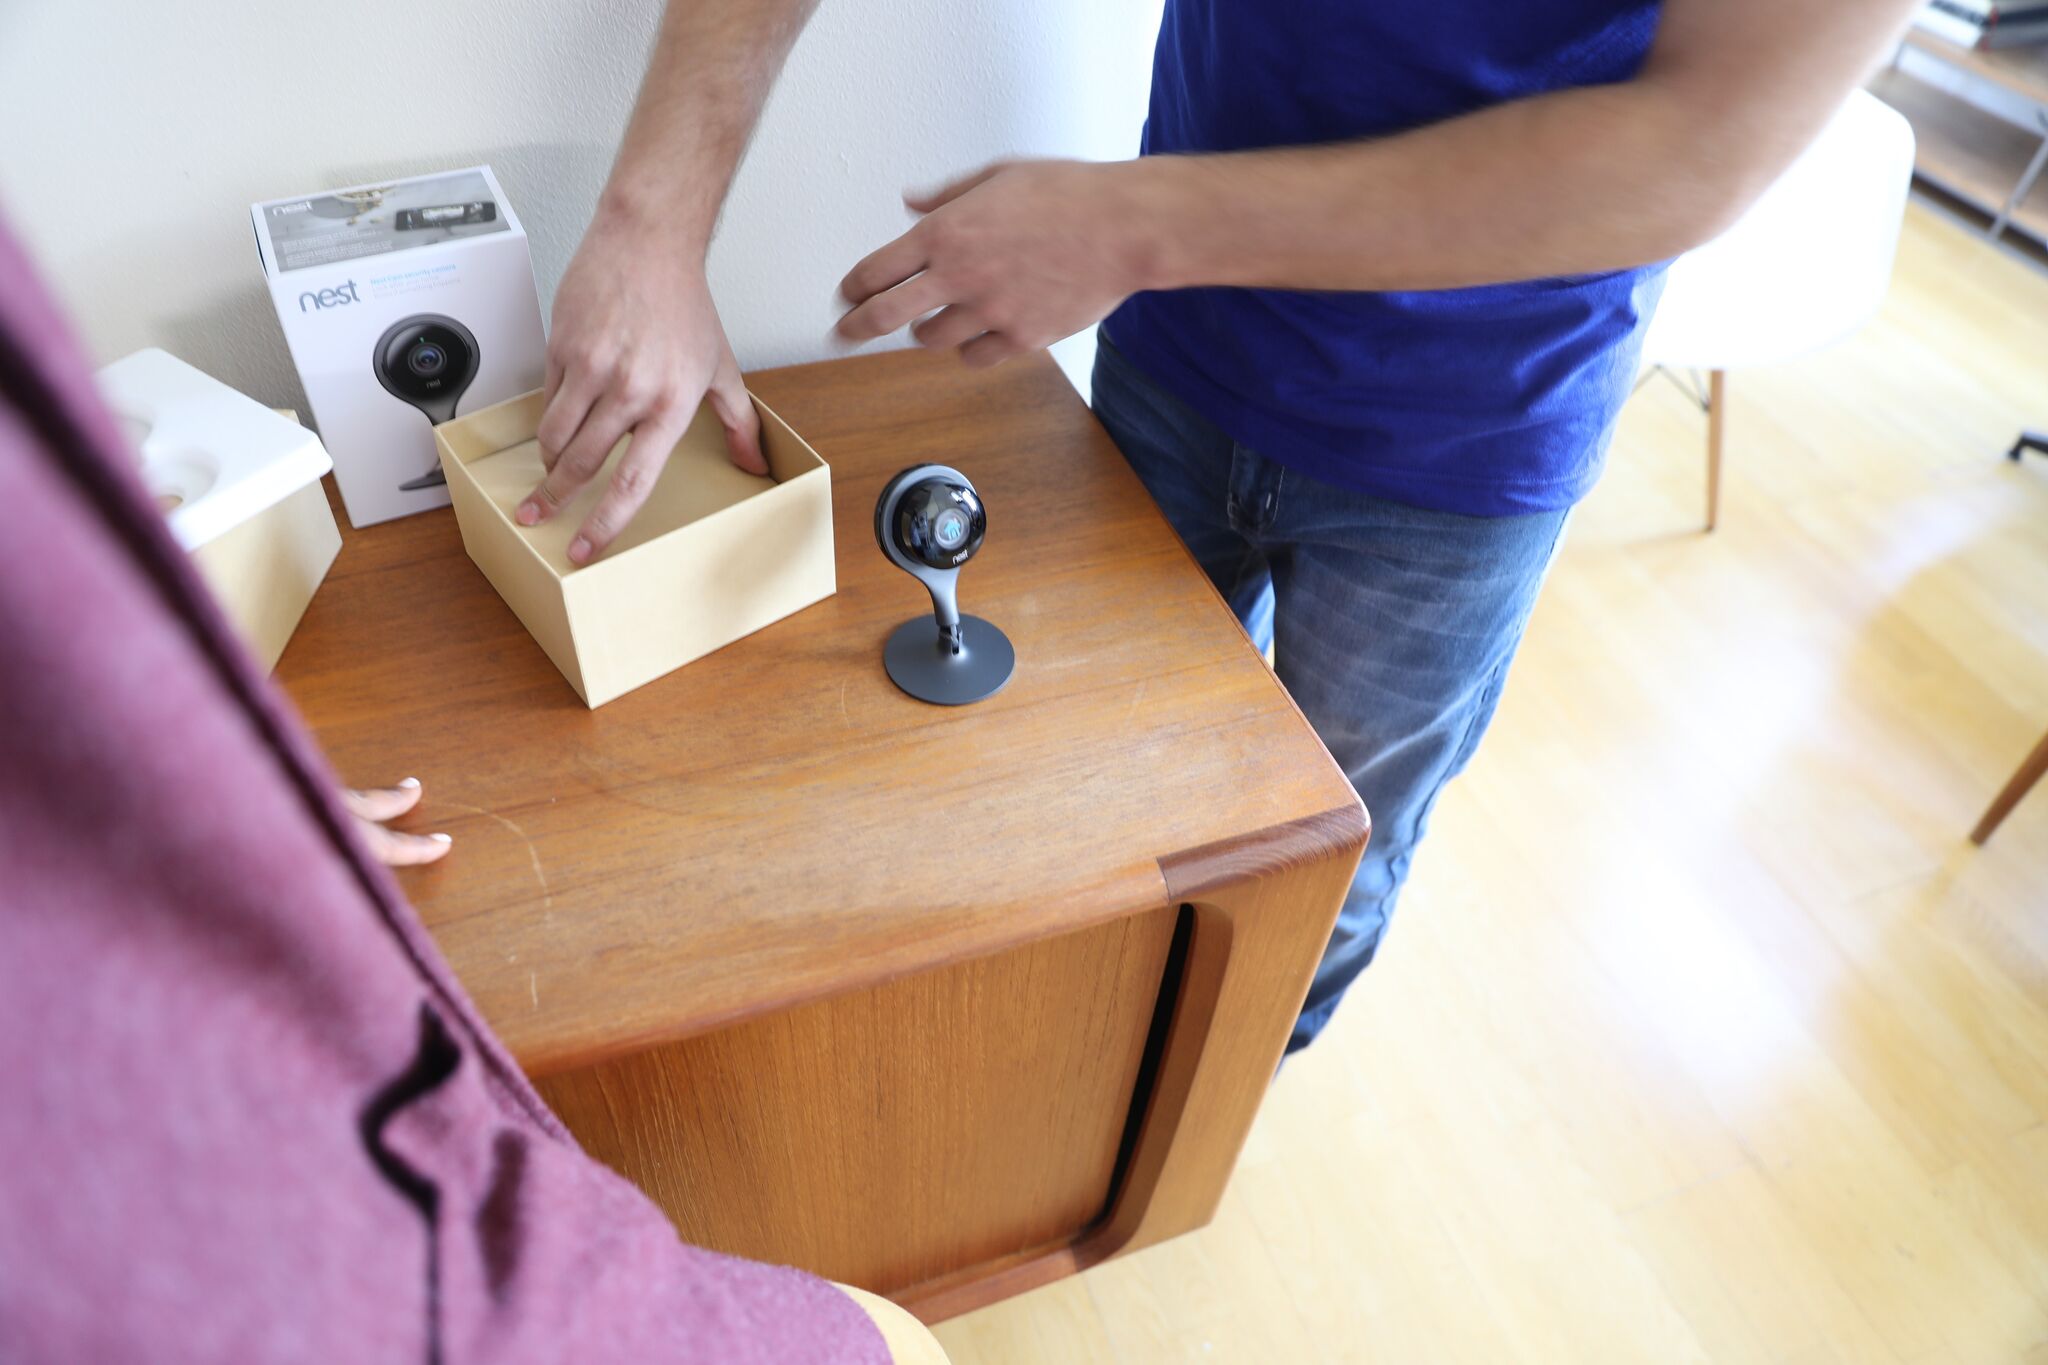
Nest camera setup
All you need to set up your Nest cam is a compatible device such as a smartphone or tablet, and a WiFi connection, along with a power source.
Connect the Nest cam to the power adapter by pushing and turning the USB connector to lock it in place. When you plug the adapter in, the camera will turn on automatically.
Download the app and create a Nest account, and then hit the “plus” sign to add your Nest cam to your account. Then, check to make sure your Nest cam is streaming video before heading outside.
Find the Right Location
Scout for the best location possible for your Nest cam. You’re going to want to take into account a few things: the spot that you want to keep an eye on, a sheltered location for your Nest cam, if possible, and access to an outdoor power source.
The Nest cam stays plugged in, so you don’t have to worry about the power running out or battery replacement. You’ll also want to place your Nest cam in a high enough location so that it will be able to clearly see – Nest recommends placing the camera 7 to 10 feet above the ground.
If you need to drill through your outdoor wall to get access to a power source, or if you have difficulty drilling the holes or getting the camera 7 – 10 feet off the ground, Puls can help! Just hop online to book a time slot that’s good for you, and a Puls technician will be at the ready to take care of your Nest cam installation for you, within the same day.

Test Your WiFi Connection
When you connect your Nest cam to your outdoor power source, it will automatically reconnect to your WiFi network. Don’t worry if this takes a minute or two. Check your smartphone to see that the Nest cam is streaming video.
If it’s having trouble picking up your WiFi signal, try moving it a few inches – this can often make a big difference. If need be, move your Nest cam to a location with a better signal.
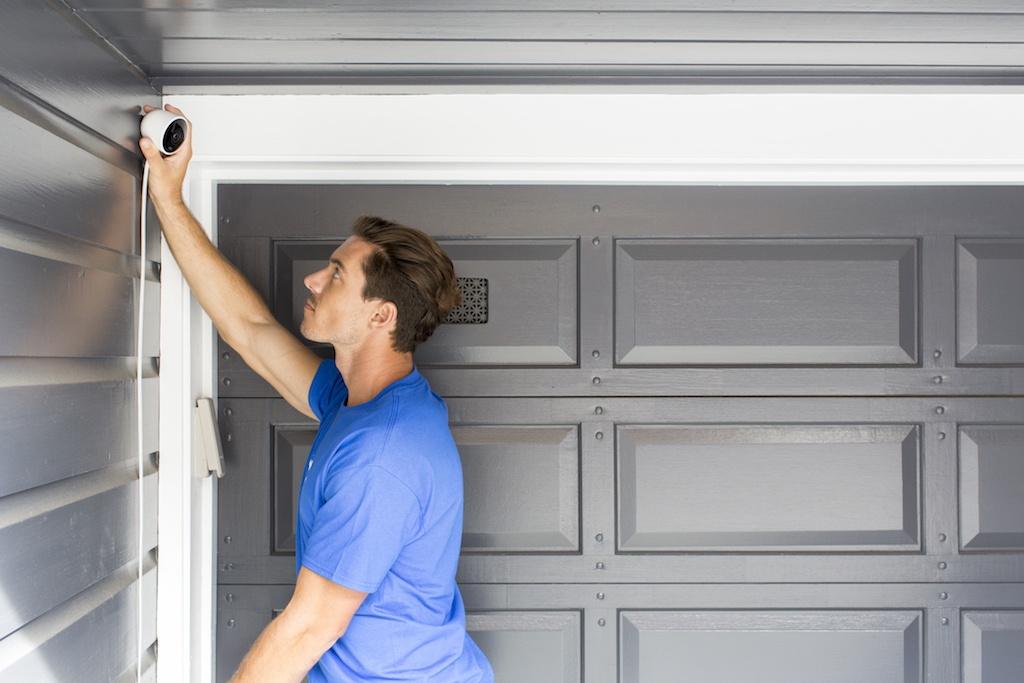
Get Your Gear and Mount Your Nest Camera
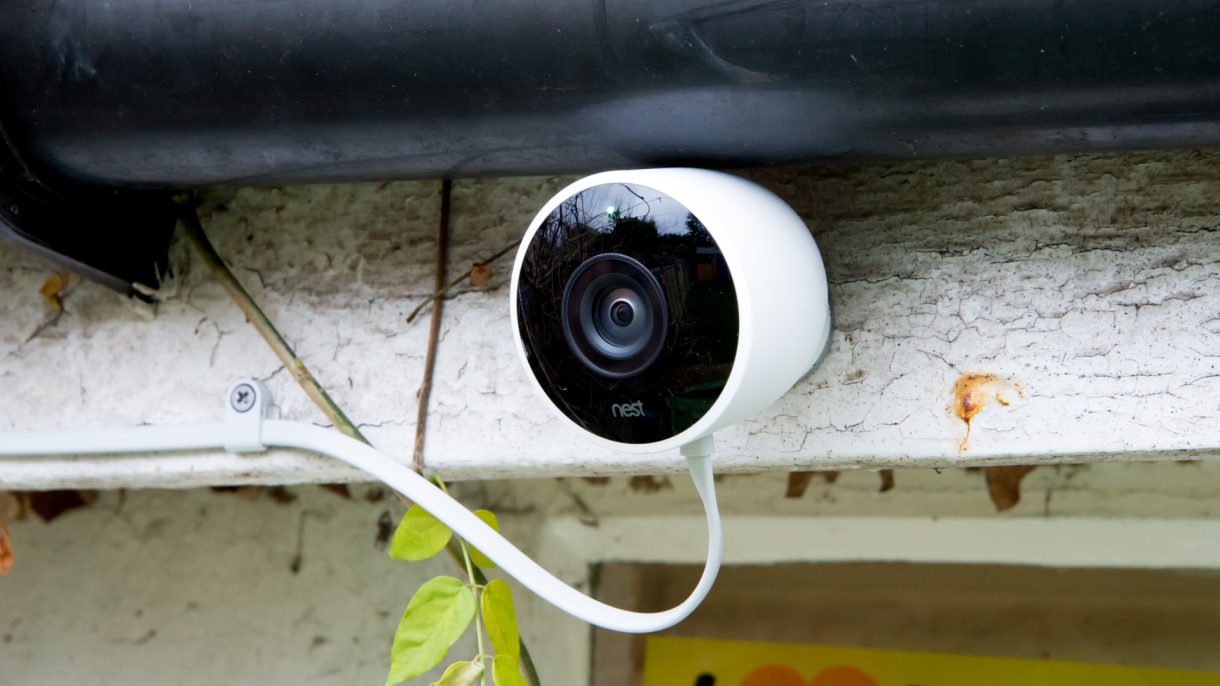
Photo Credit: Trusted Reviews
Almost everything you need will be included in the box with your Nest cam – from screws, to cable clips, to a mounting bracket.
However, you will need a Phillips head screwdriver, along with a drill, for install. If you plan on using the included plastic wall anchors for brick or masonry, you’ll need a 7/32” drill bit. Otherwise, a 3/32” bit will do.
Note: if you wish to mount your Nest cam on a metal surface, simply attach the mounting magnet directly to the surface, testing to make sure that it’s strong enough to support the camera – no need to drill any holes.
Attaching the metal wall plate is as simple as drilling a couple of holes. If you’re drilling into brick or stone, use the included plastic wall anchors. Once the metal plate is installed, place the mounting magnet on it, and then attach the Nest cam.
If this sounds too complex or you simply don’t have time, let our team of experts install yours for you. We’ll be there in a heartbeat, within the same day, so you can simply sit back, relax and enjoy your new Nest camera.
Check the View
Using your smartphone or tablet, check the streaming video and adjust the camera accordingly so you have your desired view.
Attach the Cable Clips
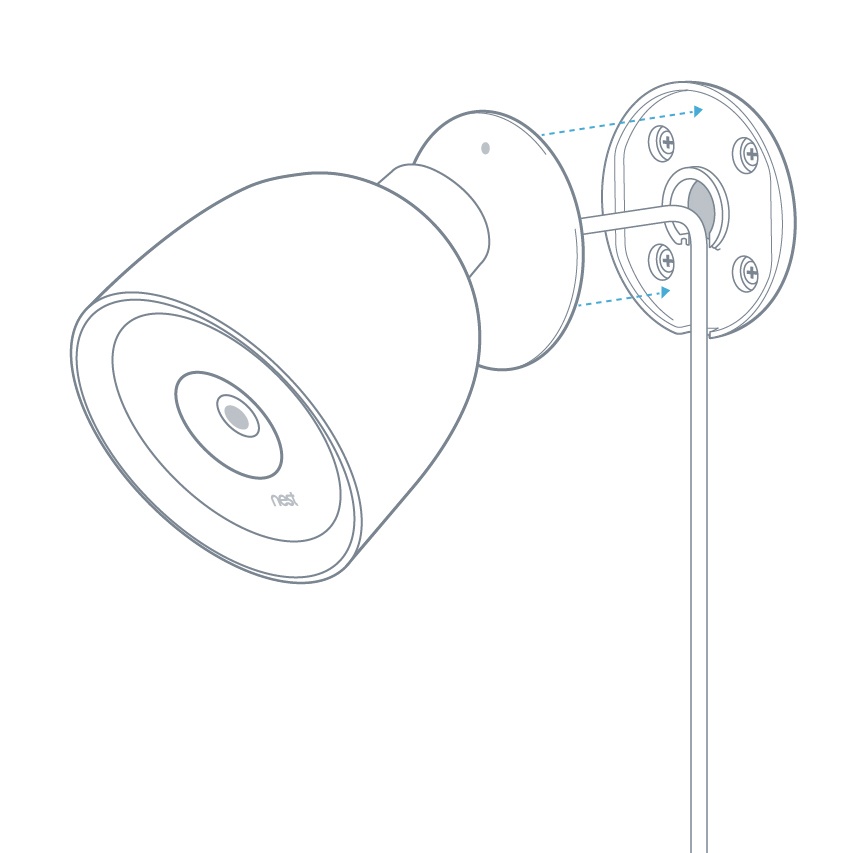 Photo Credit: Nest
Use the included cable clips at intervals to keep the cable discreetly and securely attached to the wall. You’ll want to leave a wee bit of slack between the camera and the first cable clip so you can adjust the view, if need be.
Use one screw to mount the power adapter just as you did the metal wall plate, and after securing the power adapter to the included mount, continue with the cable clips until you reach the power source.
And that’s it. Enjoy the feeling of comfort and security provided by your Nest cam, as well as the satisfaction that comes from a job well done.
Indoor Nest Camera Installation

Indoor Nest camera installation can be a bit simpler than outdoor installation due to increased ease of access to a power source, as well as the fact that you might not need to mount the camera to a wall.
After following the above directions for connecting your Nest cam to the app and Wifi, test the video stream on your device to make sure it’s properly connected.
After that, consider where you will place your Nest cam. Just like mounting your Nest cam outdoors, you can attach the magnetic base to a metal surface directly, or simply drill a couple holes for the wall plate.
However, the included Nest cam stand can make the process a bit simpler, if you just find a good spot along a shelf or on any flat surface to place the stand on. The Nest cam stand pivots back and forth 180 degrees, and allows the camera to spin in a 360 degree circle to provide the best view. Check your video stream, and you’re all set!
Look to Puls for Easy Nest Camera Installation
 Puls specializes in professional Nest cam installation, both indoors and out, and can help you through all the hurdles that Nest camera installation can throw your way – whether they’re to do with a drill bit or online setup and managing your Nest cam preferences.
Your certified Puls technician will find the best location for your Nest cam, making sure the camera is both discreetly secured and safe from the elements. Plus, they will help you through the setup and teach you how to make the most of it, so you can find the settings and preferences that are best for you!
We also offer dozens of other home installation options, including smart thermostat installation, smart doorbell installation, TV mounting and much more. Simply head online to book a time slot, and a Puls technician will be at your door in no time - even within the same day. Click here to get 5% off your first service with us.

