How to Mount a TV: Our Step-By-Step Guide

offer_banner_mobile
All Posts

So you just brought home a big, beautiful, brand new TV to put on the wall and you can’t wait to watch the latest episode of your favorite show in lovely high definition? Congrats!

But if your TV is still in the box, you may be wondering, “How exactly am I going to get this thing mounted on the wall?” If so, not to worry. Below, we explain the exact steps needed to mount your TV onto the wall. 


Book TV mounting


Before you start

There are a few things you need to figure out before you start drilling holes in the wall:

Step 1: Make sure you have the right tools, including a drill, screwdriver, studfinder, tape measure, leveler, and pencil. These will come in handy when mounting the TV.

Step 2: Decide how you want the TV to be centered. Usually, people consider the furniture and other features of the room. For example, you might want to center the TV above the mantle or above your entertainment center. On the other hand, you might want to center it with your couch. Either way, you should aim to have the TV at eye level when you are viewing -- or close to it.

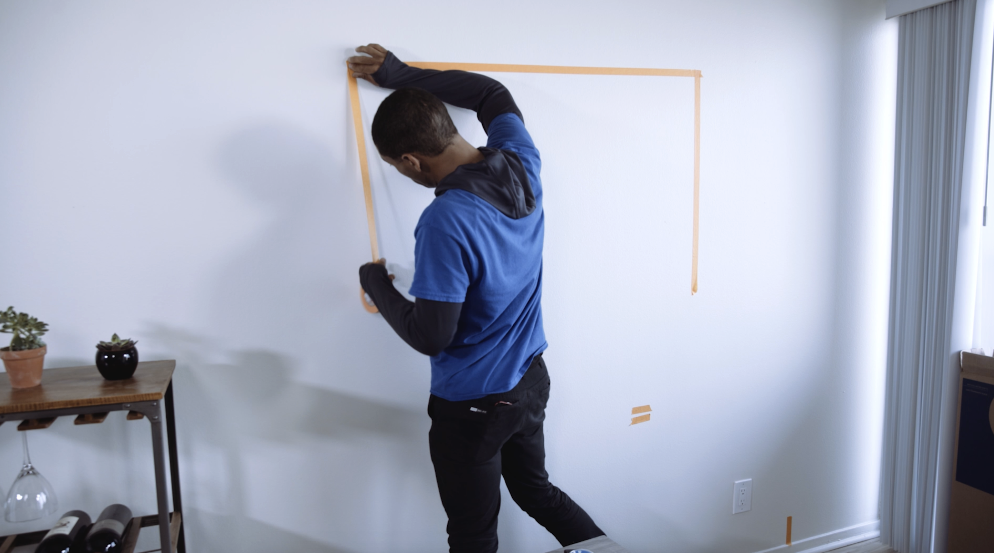
Step 3: Create a “target” with painters tape. Once you’ve decided where the TV should go, give yourself a visual guide by laying down some tape (which can be removed later). Your tape measure can help in creating a target that’s the correct size. You’ll use the tape as a reference while mounting your TV.

How to Mount a TV - Lay Down Tape on Wall

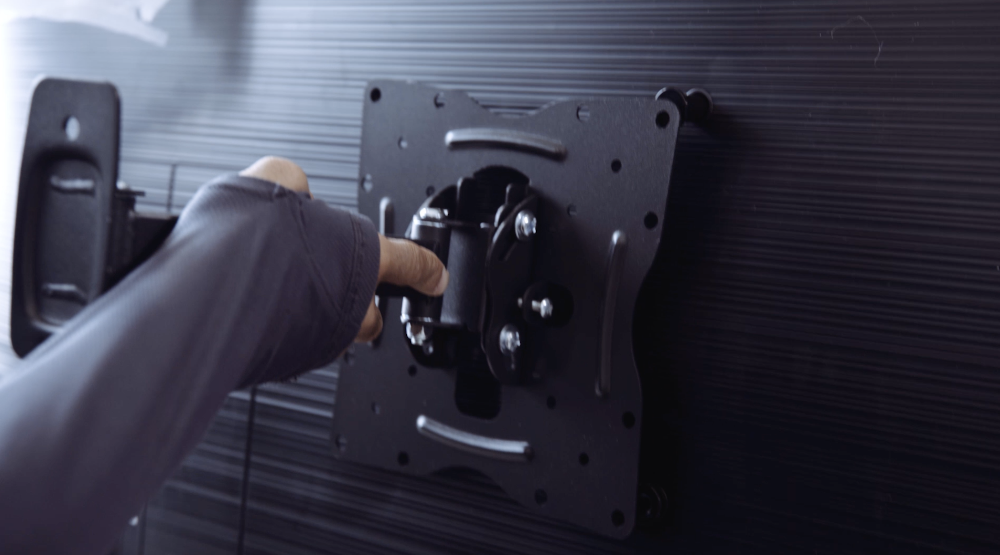
Step 4: Double check that you have the correct wall mount (also known as a bracket). There are three main types of brackets or mounts: fixed, tilted, and full-motion, which determine how much your TV can move side-to-side or up-and-down. The type is entirely up to you. Your mount also needs to support your TV size and weight. For example, if you have a 65” TV, the packaging of the mount should tell you it can hold a 65” TV. Make sure the holes on your mount line up with those on the back of your TV. 

How to Mount a TV - Match the Bracket-1-1

Step 5: Decide what you will do with the cords. Just about every TV has its own cords. So before you start mounting, consider where you plan to hide those cords at the end. You might decide to conceal them inside the wall or outside the wall (Puls can help with this).

Now it’s time to drill!

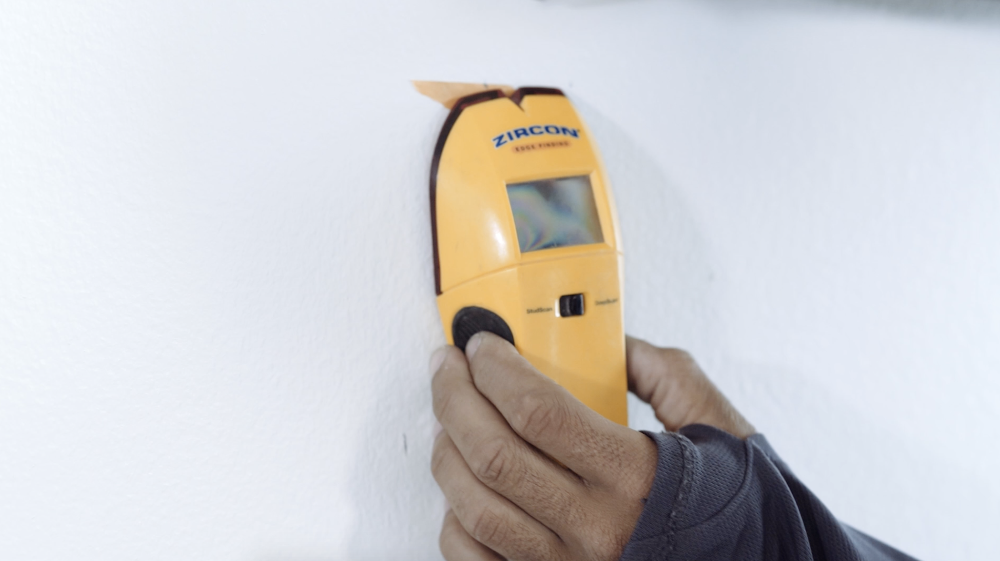
Step 6: Use the studfinder to determine where the stud is. That basically means you need to figure out where the wooden support beam is behind your wall, so you can drill into the wood and not into the hollow drywall (drywall alone typically cannot support the weight of the TV). 

How to Mount a TV - Use a Studfinder-1-1

Step 7: Mark exactly where the screws will go. Hold the mount against the wall on top of the stud and use a pencil to mark where the screws will go. This will be your blueprint.

How to Mount a TV - Use Pencil to Mark Holes

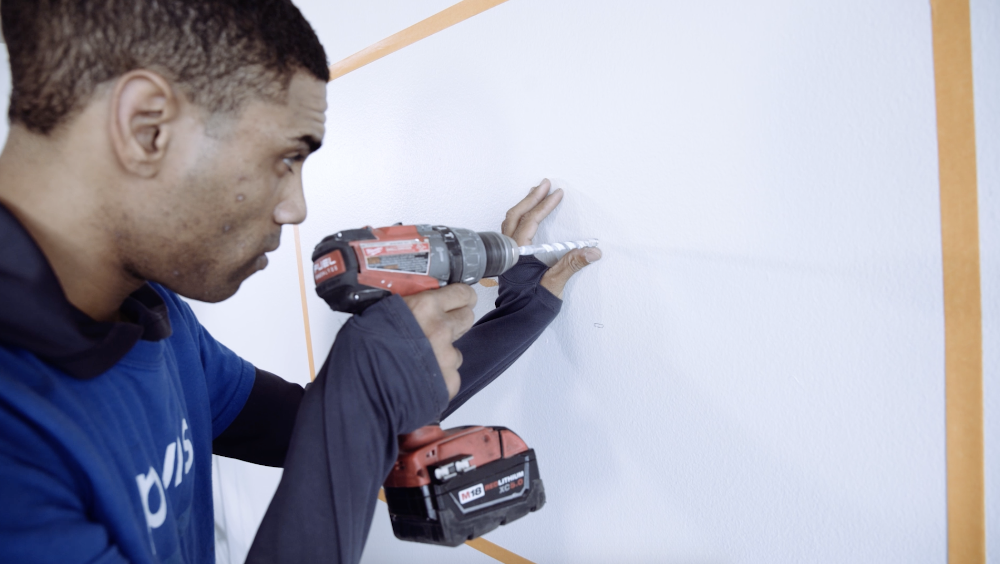
Step 8: Use the drill to pre-drill the holes in the stud. Take the drill and drill some empty holes into the wall where you have made pencil marks for each screw.

How%20to%20Mount%20a%20TV%20-%20Pre%20Drill%20the%20Holes%20in%20the%20Wall-2

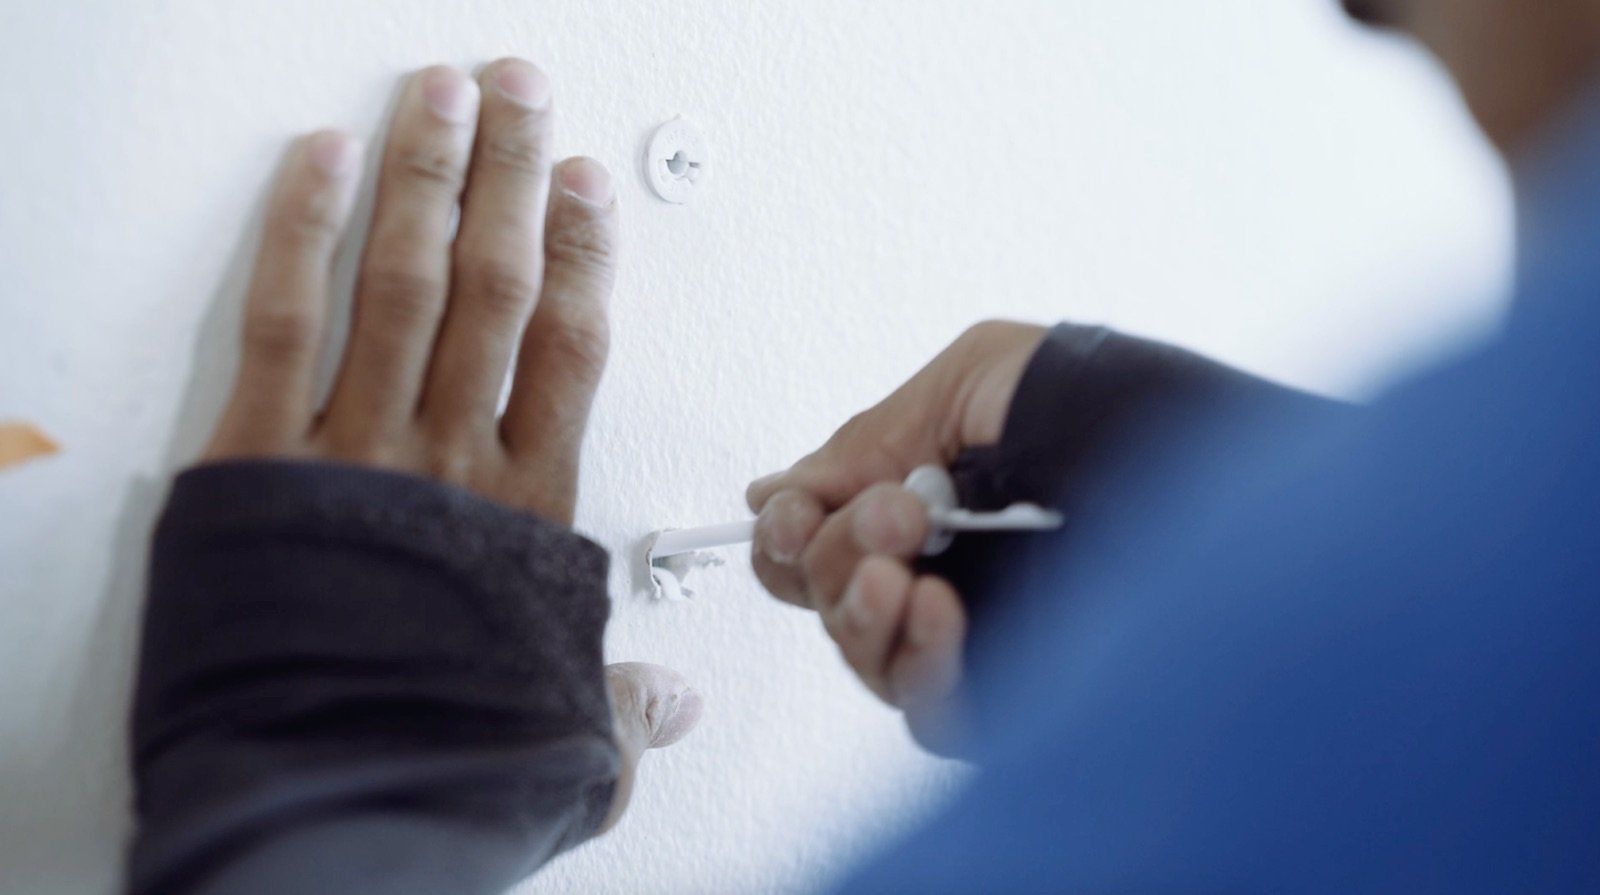
Step 9: Install “strap toggle bolts” in each hole. If you’ve never heard of a strap toggle bolt, it’s a handy item that helps to anchor your screws in the wall. It can be purchased at most hardware stores and installed very easily.

How to Mount a TV - Put in Strap Toggle Bolts

Step 10: Hold the mount against the wall drill in the screws. Leave the screws slightly loose while you adjust the placement of the mount, then come back and tighten them.

How%20to%20Mount%20a%20TV%20-%20Drill%20Screws%20Into%20the%20Wall-1

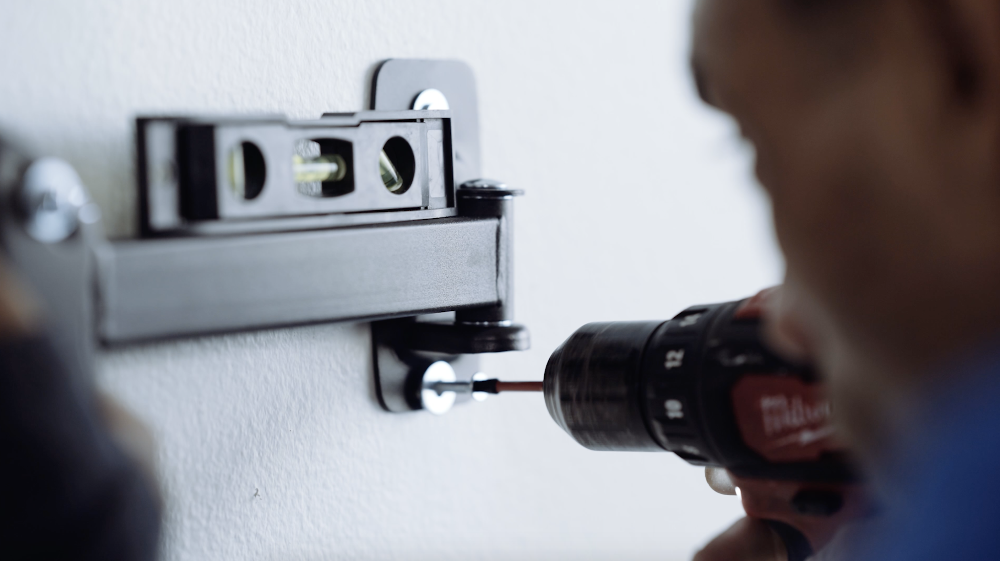
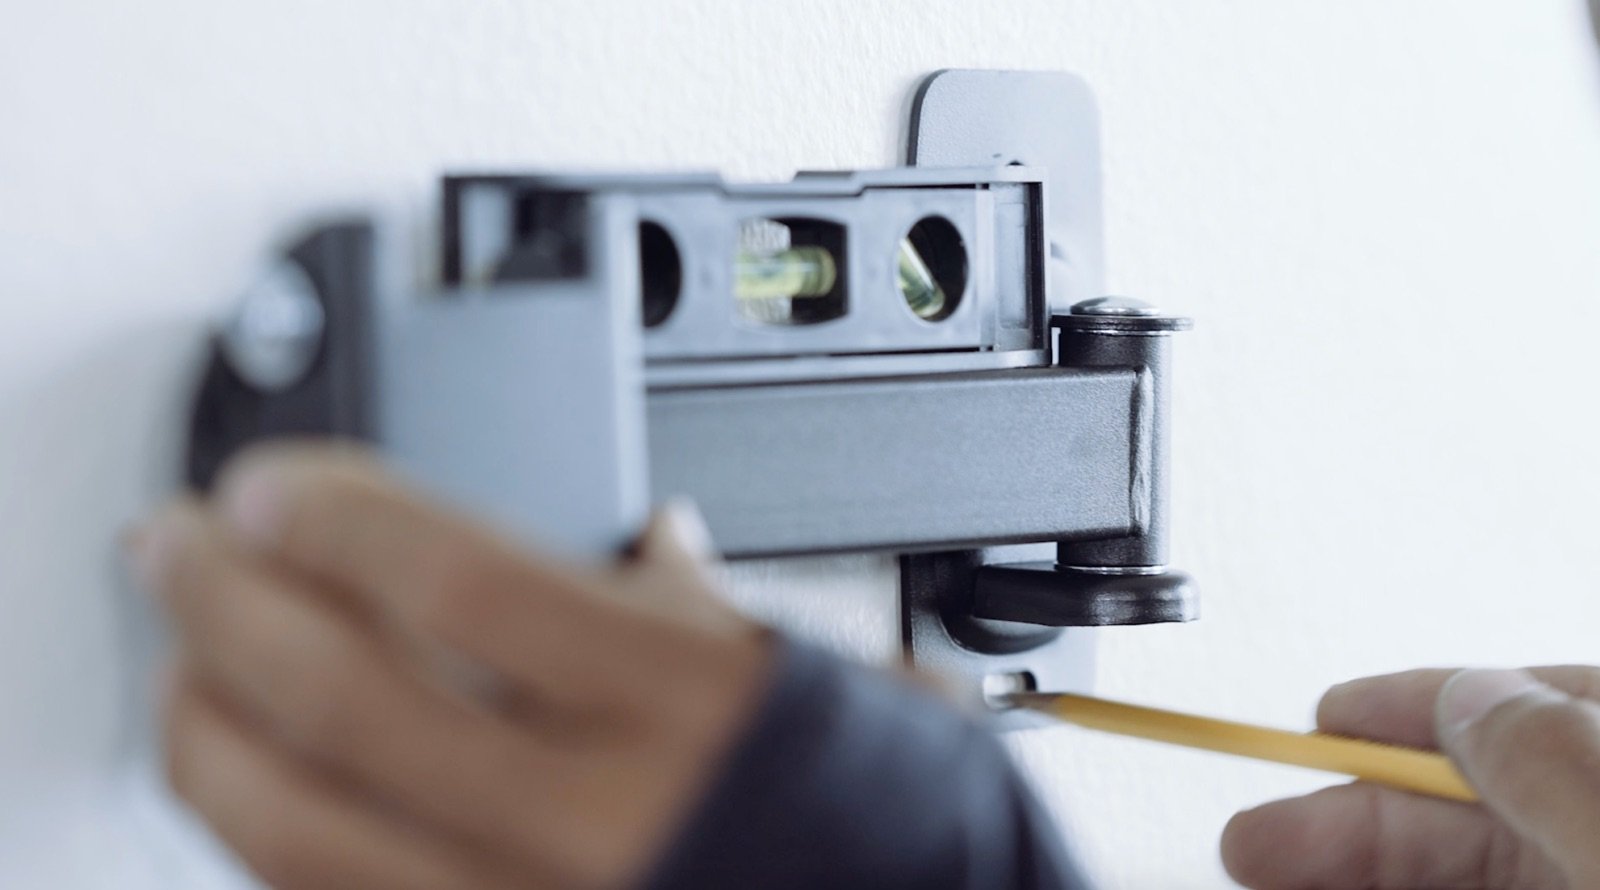
Step 11: Use a leveler to ensure the mount (and TV) will be level. The leveler is a handy tool that will show whether your mount is crooked. Place the leveler on the mount and look to see if the air bubble is directly in the middle of the crosshairs. The last thing you want is a crooked TV!

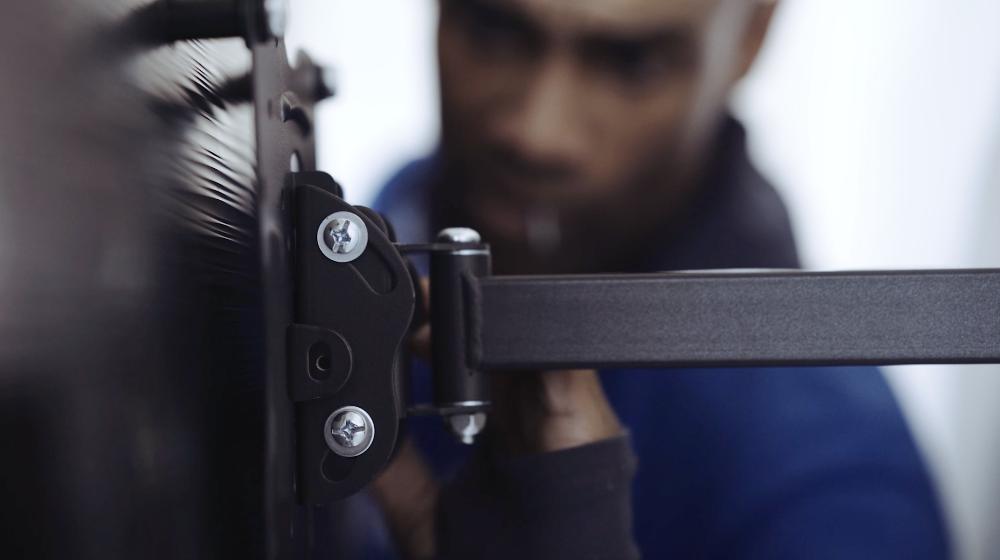
Step 12: Place the TV on the mount. Make sure the mount is secure before trusting it to hold the weight of your TV. Once the TV is on the mount, take a look to see if it appears level and then screw it securely into the mount.

How%20to%20Mount%20a%20TV%20-%20Tighten%20Screws%20to%20Secure%20TV%20to%20the%20Mount-1

Step 13: Conceal your TV cords. Most people don’t want the cords hanging down since it looks a bit messy. There are two main ways to conceal them: internal or external. Internal concealment requires installing them behind the drywall, which can be done by a professional technician from Puls. An external concealment kit can be purchased at a local hardware store.

Step 14: Clean up and enjoy! Once you’ve swept up any paint chips or dust from the drilling, you’re all done, so get ready to watch your favorite shows on a beautiful, new high quality television.


DIY not your thing? Puls is here to help

If you're not particularly crafty or you simply don't feel like dealing with all the heavy lifting and drilling, it's important to remember that self-installation certainly isn't for everyone. That's why we're here to make things easy.

Our skilled technicians will do all the drilling, lifting and technical configuration for you, so you can simply sit back, relax and get ready to enjoy your newly mounted TV. We can even help you conceal wires, mount shelving and sound bars, or hook up devices like your XBOX.

Simply hop online an book an appointment with our expert technicians at a time that works best for your busy schedule. We can be there within the same day to make things as seamless and convenient as possible.

Book TV mounting

Benjamin F.
Benjamin Feldman is the Head of Content at Puls. He enjoys helping people learn how the devices in their home actually work and how to tackle the most important repairs. In his free time, he enjoys running, visiting new cities, and learning how to cook.
Related Posts

Staying on top of home maintenance doesn’t have to feel like a constant project. Most homeowners don’t need more reminders—they need a simpler way to organize what already matters. That’s where a monthly home maintenance calendar comes in. Instead of reacting to issues or juggling long checklists, a calendar-based approach creates a steady rhythm that keeps your home running smoothly throughout the year. Why Monthly Planning Feels Easier Big seasonal lists tend to show up all at once and demand attention when life is already busy. Monthly planning spreads things out so nothing feels urgent or overwhelming. When you know exactly what to focus on each month, home care becomes more predictable—and much easier to fit into real life. How the Puls Home Maintenance Calendar Is Structured The Puls home maintenance calendar is designed to reduce mental load, not add to it. Each month focuses on just three types of tasks, keeping things clear and manageable: Quick Wins Seasonal Must-Dos Call in a Pro Tasks This structure ensures that important maintenance stays on track without turning home care into a full-time job. Quick Wins: Light Tasks That Keep Things on Track Quick wins are small, low-effort actions that help maintain comfort and performance around the home. They’re designed to be fast, easy to remember, and satisfying to complete. These tasks help homeowners feel like they’re staying ahead without committing large amounts of time or energy. Seasonal Must-Dos: Staying in Sync With the Year Every season brings small shifts in how a home is used. Seasonal must-dos help align your home with those changes in a calm, planned way. Because these tasks are anticipated in advance, they don’t come with urgency or stress. They simply support comfort, efficiency, and everyday use as the year progresses. Call in a Pro: Built-In Professional Support Some maintenance tasks are best handled by a professional—not because something is wrong, but because it’s easier and more reliable that way. Each month includes at least one Call in a Pro task, giving homeowners a clear moment to bring in expert help and keep things handled properly without guesswork. Puls technicians fit seamlessly into this system, handling professional tasks efficiently and helping homeowners stay consistent without juggling multiple providers. Why This System Reduces Stress With only three task types to think about, maintenance stays focused and manageable. There’s no pressure to do everything at once, and no feeling that something critical is being missed. Homeowners following a calendar-based approach often feel more confident simply because they know what’s coming next. Consistency Without Perfection This system doesn’t rely on doing everything perfectly. Missing a task one month doesn’t derail anything—the calendar simply brings your focus back the next month. That flexibility is what makes monthly maintenance sustainable and realistic over time. A Calmer, More Organized Way to Care for Your Home When maintenance is predictable and supported, it stops feeling like a chore. It becomes part of the background—quietly supporting comfort, safety, and daily life. A monthly home maintenance calendar turns home care into a steady rhythm, and with Puls technicians available for professional tasks, staying on top of your home feels simple, not stressful.

  • 4 min read
  • 03/23/26

Even in mild climates, decks and fences are exposed to the elements every day. Sunlight fades color and weakens coatings, humidity causes wood to expand and contract, and soil movement shifts posts and support beams. Over time, this wear and tear leads to cracks, discoloration, and loose boards that can compromise safety and appearance.

  • 12 min read
  • 10/28/25

As the chill of winter truly settles in, your home's heating systems are working overtime to keep you warm and comfortable. Among these vital systems, your water heater often goes unnoticed, quietly providing the hot water essential for everything from warm showers to clean dishes. But beneath its unassuming exterior, a silent threat might be undermining its performance, costing you money, and potentially shortening its life: sediment buildup.

  • 7 min read
  • 09/01/25