How to Install a TV Without Damaging the Wall

offer_banner_mobile
All Posts

Installing a TV on your own isn’t always as complex as it seems. That being said, there are many things that can go wrong, leaving your wall in shambles, or perhaps worse, your costly TV shattered on the ground.

It’s always important to do your research, and take all the proper precautions before you get started to avoid extensive damage to your wall, TV, and personal safety. Don’t risk a disaster - learn how to install a TV without damaging the wall in this simple, step-by-step guide.


What Tools You’ll Need

You should have the following tools on hand in order to properly install a TV without damaging the wall:

  • Drill
  • Screws and a screwdriver
  • Stud finder
  • Pencil
  • Tape measure
  • Leveler
  • TV bracket

Decide Where to Place It On the Wall

TV mounting wall placementBefore you decide to mount your TV, it’s important to note the weight of your TV itself, as well as how much weight your walls, and the TV bracket you use with installation, can bear.

Some TVs can weigh 100 pounds or more, and if you don’t locate a stud on your desired wall that can support that weight, your TV could end up falling down. You’ll need to find a wall and a TV bracket that will support your TV’s full weight.

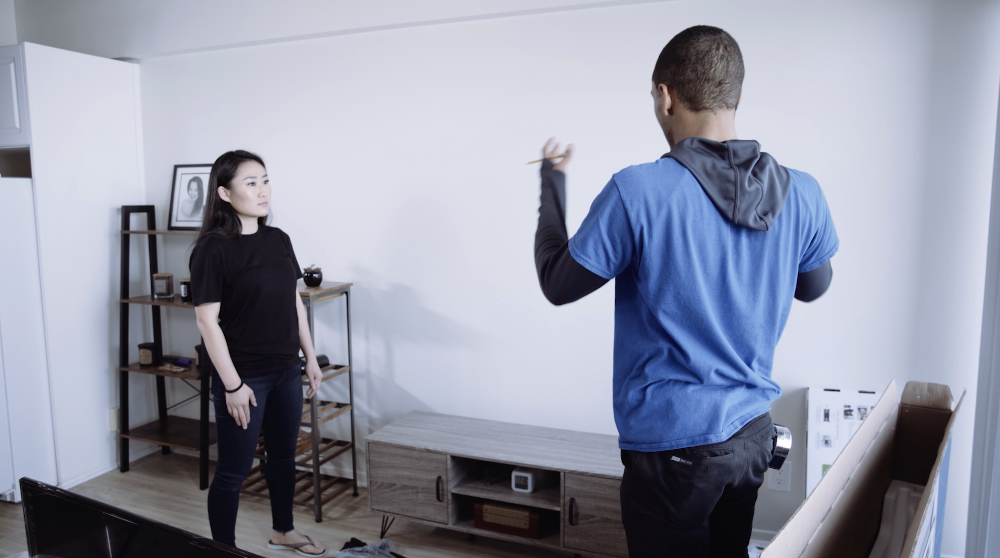
You should decide right away where you’d like the TV mounted on the wall (i.e. centered, in a corner, etc.). Typically, the TV should be at your eye level, so also think about from what point in the room you’ll be watching, such as your couch or bed.

It’s also important to consider what type of wall you’ll be dealing with before you get started. Brick and cement walls tend to be the most sturdy, but they can also be the most challenging to install a TV on.


Choosing a Bracket

TV bracket for TV mounting
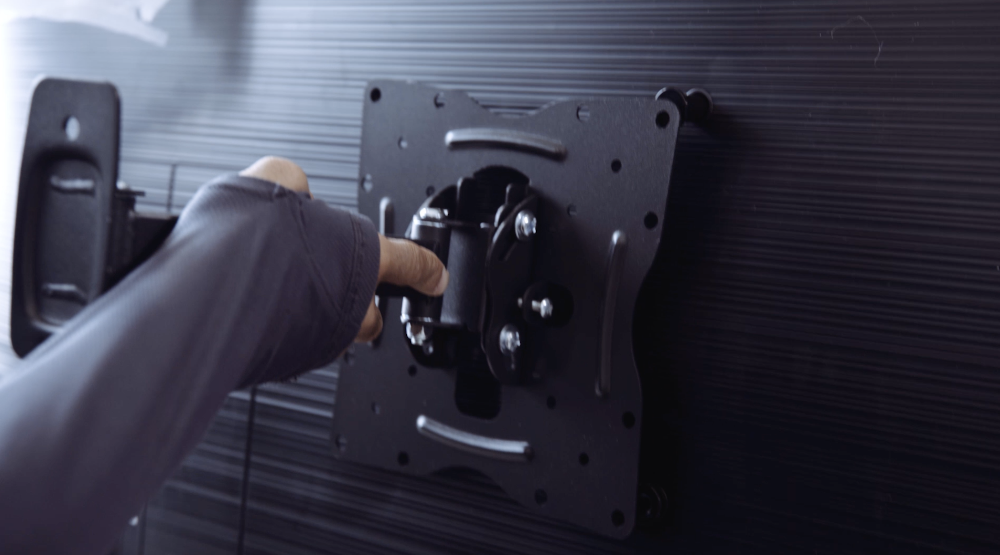
As noted above, you’ll need to select a TV bracket before you get started with install. The bracket is an apparatus that attaches to both the TV and the wall, keeping your TV secure and in place.

You’ll need to make sure that the bracket will for your TV, and be able to support its full weight - you can check its box and specifications for full details on this. The most popular bracket styles are fixed, tilting, full motion, and corner TV mounts, and to help you select one, check out our in-depth blog post on which type of TV mount to use.


Measure it Out

laying down tape on the wall
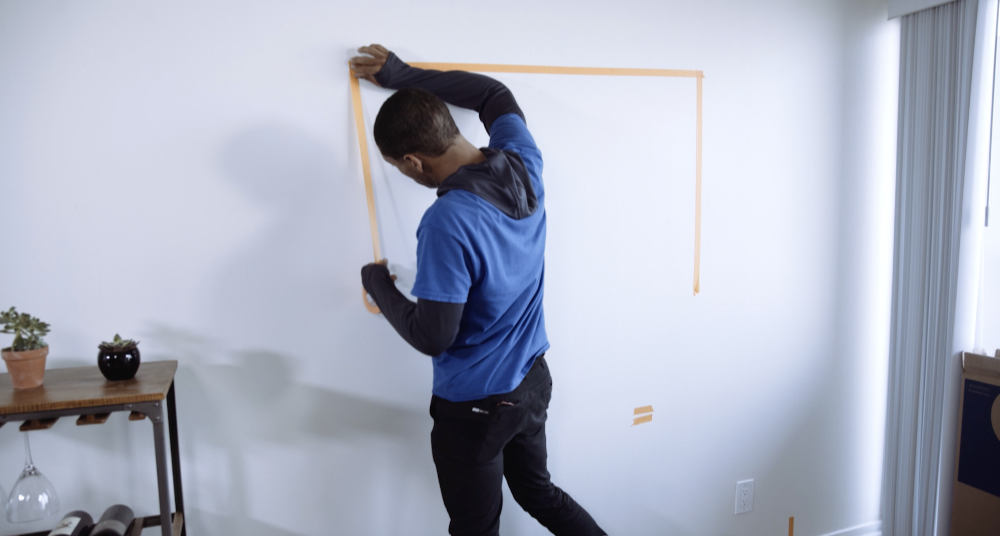
After you’ve selected a bracket, it’s time to measure your TV, and your TV bracket itself, so you can make a plan regarding where to mount it and where it’ll fit adequately on the wall. Next, we’d recommend laying down tape where you plan to mount the TV, as a visual guideline to stick to.

This should help you stay on target, and place your TV exactly where you want it. You can also use a leveler when laying the tape down, to ensure that it’ll be nice and even when it’s installed.

Book TV mounting

Using a Stud Finder

using a stud finder for TV install
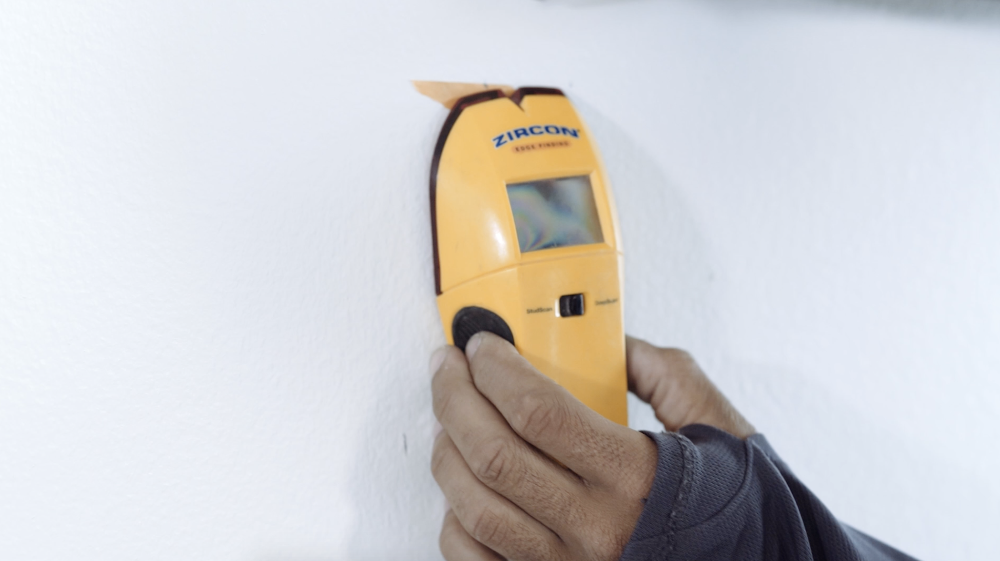
Now it’s time to break out that stud finder, the tool you’ll use to locate the stud behind the wall. The stud is a sturdy part inside the wall that you’ll attach the TV bracket to, it will support your TV best and will prevent any damage to the wall or your TV itself.

If you don’t have a stud finder, you can always use a magnet instead. Then, based on the stud’s location inside the wall, use your pencil to mark where the screws to hold up the TV bracket should go, and where your bracket should attach to the stud beneath the wall.


Installing the Bracket on the Wall

drilling screws into the wall
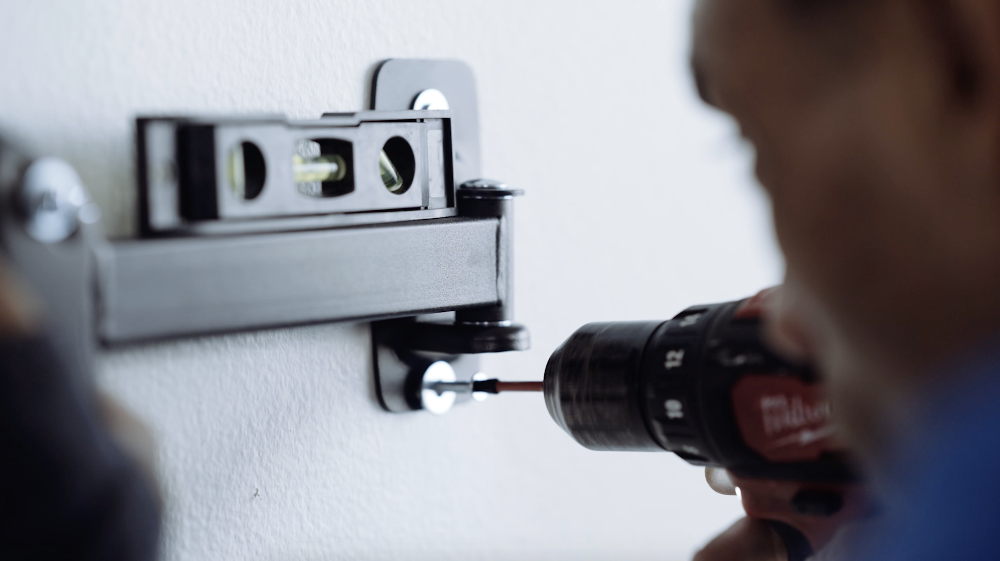
After you’ve located and marked where you’ll want the bracket to go, use the drill to pre-drill the holes into the stud. When these screws go in, they should feel solid and stable, another indication that your TV will be installed securely, without damaging the wall whatsoever.

You should also use a leveler to make sure that the bracket is even, and level with the ground, so that your TV won’t look crooked once it’s installed. Once you have the holes ready, hold the bracket against the wall, and drill the screws in tightly, so that they hold in place.


Lifting the TV

tighten screws to secure TV to the moun
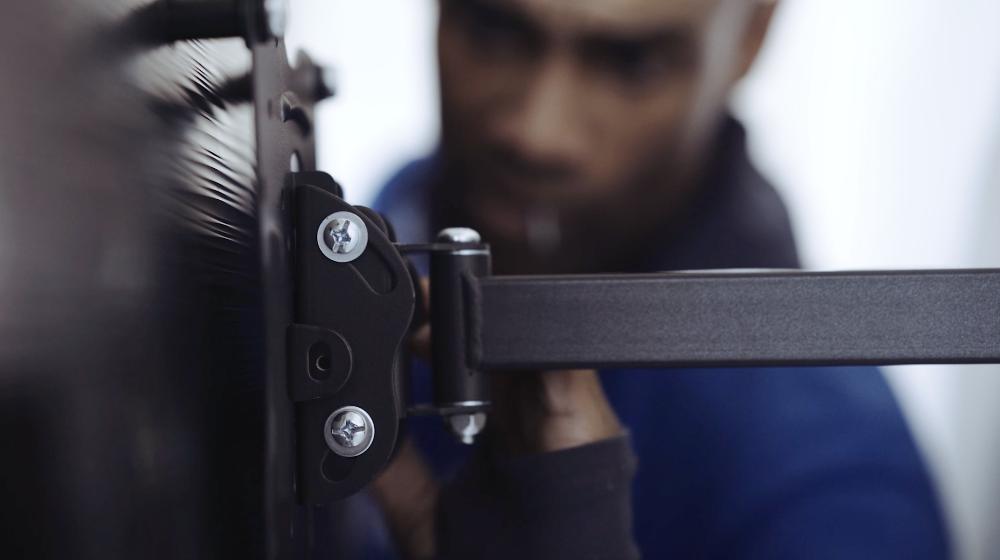
Now that you’ve installed the bracket onto the wall, you’ll need to carefully lift the TV and place it onto the bracket. Don’t be afraid to ask for help, if necessary, especially if you have a heavy TV - we’d recommend having 2 people lift TVs that are 60” and above.

Then, screw the mount onto the back of the TV with the screws and screwdriver, to ensure that it’s secure. Depending on the type of mount, there may be a few places to tighten and adjust the screws before you’re finished, so check them all to be sure.

Once you’re done, take a step back and make sure that the TV looks as secure and even as possible. Because you’ve taken all the proper precautions and used a mount and stud that will support your TV’s full weight, you’ll be good to go with that beautifully installed TV, completely damage-free.


Puls is Here to Make Install a Breeze

Puls TV mounting technicianSome things just aren’t worth the risk. Whether you’re not the most DIY savvy or you simply prefer to not risk potential costly errors, there’s no harm in leaving installation to the pros. For professional installation that works around your busy schedule, Puls is here to make it easy.

Our skilled TV install experts will come to you during the time that best suits your busy schedule, including weekends, evenings and holidays. We’ll do all the measuring, drilling and heavy lifting for you, and we can even hide the wires, hook up your surround, install shelves and much more.

Book a service with our experts today, and your TV could be professionally installed by as soon as tonight - you’ll be glad you did. Click here for 5% off your first service with us.

Book your TV mounting service

Natalie H.
Natalie Hoke is a writer and content manager at Puls. She is passionate about discovering the latest trends in home technology and using humor to tell a great story. In her spare time, she enjoys volunteering, travel, cooking (and eating) vegetarian food, and performing stand-up comedy.
Related Posts

Home maintenance can feel overwhelming when it’s framed as one endless checklist. When everything seems important at once, it’s easy to delay action altogether and hope nothing urgent pops up. A room-by-room strategy makes home care feel more manageable. Instead of thinking about your home as one big project, you focus on individual spaces. This makes it easier to notice small changes, address issues early, and avoid the kind of problems that grow quietly over time. Kitchen: Where Wear and Tear Adds Up Fast Kitchens combine water, electricity, heat, and daily use, which naturally increases the chances of things wearing down. Under-sink leaks, loose outlets, and aging fixtures are common early warning signs. Because many kitchen components are tucked away inside cabinets, small problems often stay hidden until damage spreads. Catching these issues early keeps repairs simpler, faster, and far less expensive. Bathrooms: Constant Moisture, Constant Risk Bathrooms deal with daily humidity, which puts ongoing stress on plumbing connections, fixtures, and surfaces. Slow drains, loose faucets, or subtle discoloration around fixtures are often the first signs that something needs attention. Moisture-related issues rarely resolve on their own. Addressing them early helps prevent mold growth, water damage, and structural problems that can disrupt your home and budget. Living Areas: Subtle Signals Matter In living rooms and bedrooms, maintenance issues often show up visually or electrically. Small wall cracks, flickering lights, or loose mounted items can indicate settling, wiring wear, or anchor problems inside the walls. Because these changes happen gradually, they’re easy to normalize. Paying attention early keeps fixes straightforward and prevents damage from spreading behind the scenes. Entryways and Hallways: High Traffic, High Stress Doors, frames, and walls in high-traffic areas experience constant movement and pressure. Sticking doors or shifting frames can be early signs of alignment issues or normal structural movement that needs adjustment. Handling these issues early keeps everyday wear from turning into long-term damage that affects multiple rooms. Laundry Areas: Small Spaces, Big Impact Laundry hookups are one of the most common sources of unnoticed leaks. Hoses, valves, and drains wear down slowly, and even minor drips can lead to significant water damage if left unchecked. Because laundry areas are often out of sight, problems here tend to go unnoticed longer than they should. Regular inspection and timely service can prevent costly flooring and wall repairs. Why a Room-by-Room Approach Works Breaking maintenance down by room helps homeowners feel more in control of their home. It creates a natural rhythm for checking key areas without feeling like everything needs attention at once. This approach also makes it easier to prioritize. Rooms with water, electricity, or heavy use naturally deserve more frequent attention than low-impact spaces. How This Strategy Helps With Budgeting Room-based maintenance spreads costs out over time instead of letting them pile up into emergency repairs. Small, planned fixes are easier to budget for than sudden, expensive problems. Homeowners who take this approach often find they spend less overall—not because they avoid repairs, but because they handle them at the right moment. Peace of Mind Comes From Knowing What’s Normal When you check your home consistently, you start to recognize what’s normal and what’s new. That awareness makes it easier to spot issues early and take action without panic. Instead of wondering whether something has “always been like that,” you can make informed decisions with confidence. Where Professional Help Makes the Biggest Difference Professional technicians understand how issues in one room can affect the rest of the home. A trained eye can spot early warning signs that aren’t obvious to homeowners. Puls technicians can inspect multiple areas efficiently and handle repairs across rooms and systems, making it easier to stay ahead of maintenance without juggling multiple service providers. Why Proactive Service Is Easier Than Reactive Repairs Emergency repairs often come with stress, scheduling pressure, and limited options. Proactive service allows homeowners to plan repairs around their schedule and avoid last-minute decisions. Calling a Puls tech early helps keep home maintenance predictable, manageable, and far less disruptive. Consistency Beats Perfection Home care isn’t about fixing everything at once or chasing an ideal standard. It’s about steady attention and timely action. A professional-first, room-by-room approach keeps your home running smoothly, protects its value, and helps you avoid costly surprises down the line.

  • 5 min read
  • 05/04/26

Staying on top of home maintenance doesn’t have to feel like a constant project. Most homeowners don’t need more reminders—they need a simpler way to organize what already matters. That’s where a monthly home maintenance calendar comes in. Instead of reacting to issues or juggling long checklists, a calendar-based approach creates a steady rhythm that keeps your home running smoothly throughout the year. Why Monthly Planning Feels Easier Big seasonal lists tend to show up all at once and demand attention when life is already busy. Monthly planning spreads things out so nothing feels urgent or overwhelming. When you know exactly what to focus on each month, home care becomes more predictable—and much easier to fit into real life. How the Puls Home Maintenance Calendar Is Structured The Puls home maintenance calendar is designed to reduce mental load, not add to it. Each month focuses on just three types of tasks, keeping things clear and manageable: Quick Wins Seasonal Must-Dos Call in a Pro Tasks This structure ensures that important maintenance stays on track without turning home care into a full-time job. Quick Wins: Light Tasks That Keep Things on Track Quick wins are small, low-effort actions that help maintain comfort and performance around the home. They’re designed to be fast, easy to remember, and satisfying to complete. These tasks help homeowners feel like they’re staying ahead without committing large amounts of time or energy. Seasonal Must-Dos: Staying in Sync With the Year Every season brings small shifts in how a home is used. Seasonal must-dos help align your home with those changes in a calm, planned way. Because these tasks are anticipated in advance, they don’t come with urgency or stress. They simply support comfort, efficiency, and everyday use as the year progresses. Call in a Pro: Built-In Professional Support Some maintenance tasks are best handled by a professional—not because something is wrong, but because it’s easier and more reliable that way. Each month includes at least one Call in a Pro task, giving homeowners a clear moment to bring in expert help and keep things handled properly without guesswork. Puls technicians fit seamlessly into this system, handling professional tasks efficiently and helping homeowners stay consistent without juggling multiple providers. Why This System Reduces Stress With only three task types to think about, maintenance stays focused and manageable. There’s no pressure to do everything at once, and no feeling that something critical is being missed. Homeowners following a calendar-based approach often feel more confident simply because they know what’s coming next. Consistency Without Perfection This system doesn’t rely on doing everything perfectly. Missing a task one month doesn’t derail anything—the calendar simply brings your focus back the next month. That flexibility is what makes monthly maintenance sustainable and realistic over time. A Calmer, More Organized Way to Care for Your Home When maintenance is predictable and supported, it stops feeling like a chore. It becomes part of the background—quietly supporting comfort, safety, and daily life. A monthly home maintenance calendar turns home care into a steady rhythm, and with Puls technicians available for professional tasks, staying on top of your home feels simple, not stressful.

  • 4 min read
  • 03/23/26

Even in mild climates, decks and fences are exposed to the elements every day. Sunlight fades color and weakens coatings, humidity causes wood to expand and contract, and soil movement shifts posts and support beams. Over time, this wear and tear leads to cracks, discoloration, and loose boards that can compromise safety and appearance.

  • 12 min read
  • 10/28/25