What to Do if Your Dishwasher Won’t Start

offer_banner_mobile
All Posts

Doing the dishes isn’t exactly America’s favorite pastime, but a hard-working dishwasher makes the task much more tolerable—and quicker—so we can get back to things we actually enjoy (like anything but the dishes). So, when your dishwasher suddenly won’t start, it’s easy to panic and think you’ll be shelling out a hefty amount to replace it, but there are actually a few things you can do to troubleshoot what’s wrong and fix it on your own.

Best of all, some of these solutions are super simple and don’t even require any tools at all. Here’s a list of the most common scenarios as to why your dishwasher won’t start, and step-by-step guidance on how to fix them.

Book an appliance repair

Check to See if the Child Lock is On

dishwasher child lock

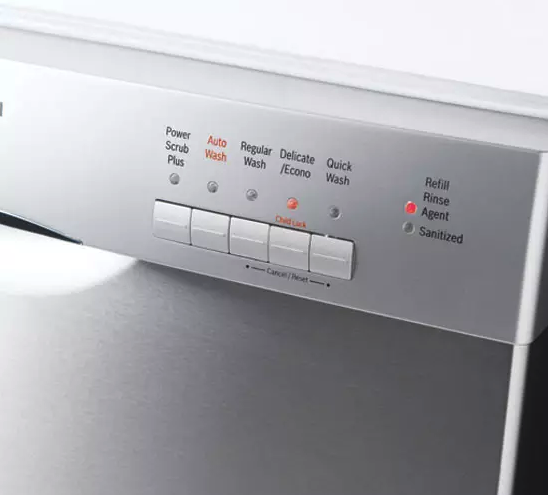
Credit: ajmadison.com

To prevent little ones from accidentally starting the appliance, your dishwasher has a child lock function that, when activated, will essentially ignore any other buttons that are pressed. If your dishwasher isn’t starting, start by checking to see if the child lock function is currently in use.

Every dishwasher is different, so be sure to refer to your manual if you’re uncertain what this may look like. Typically, you’ll see a symbol of a lock on the control board. If the child lock function is activated, it will be illuminated.

If you see that the child lock is lit, press the button down for about five seconds until the light goes off (or refer to your manual on how to shut the child lock function off). You should be able to start a new cycle right away once the child lock function is off.


Look at How the Door is Closing

dishwasher door closing

In order for a dishwasher to start a cycle, the door must be completely shut and the latch must lock—otherwise the dishwasher won’t be able to start. If your dishwasher won't start, check to make sure there are no obstructions that are preventing the door from shutting, like a large utensil or an oversized bowl.

Once the obstruction is gone, you should be able to shut and latch the dishwasher and it should start as normal.


Inspect for a Broken Latch

dishwasher latch
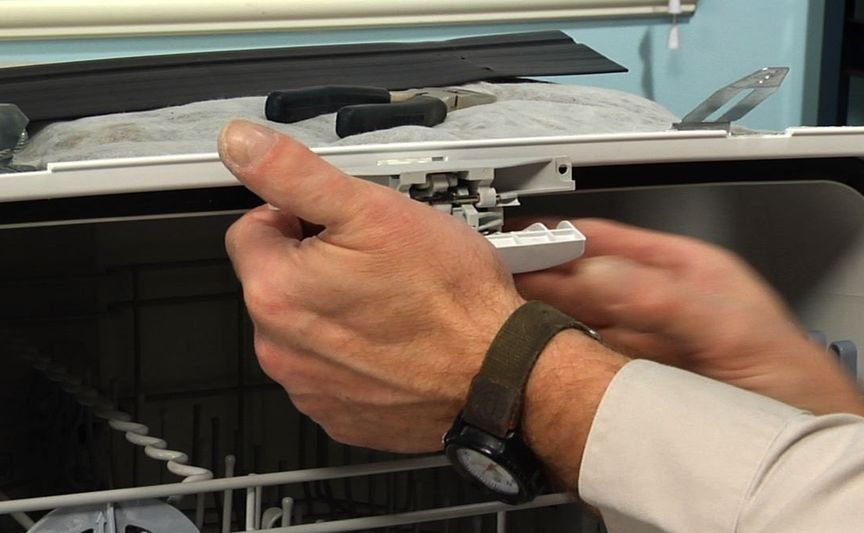
Credit: instructables.com

Occasionally, a dishwasher won’t start because the latch is broken. This is a simple fix that you should be able to do at home.

Supplies you’ll need:

  • A Torx bit screwdriver

  • A replacement latch that matches with your dishwasher model

First, you’ll need to shut off the power to the dishwasher from the breaker box. Once the power is off, take your Torx bit screwdriver and unscrew all of the screws that are on the interior panel of the dishwasher door.

After all of the screws are out, separate the interior panel. You should now see the bad latch, which should be attached to two sets of wires.

Remove the old latch from the wires (they should pop off pretty easily without tools) and then connect the new latch to the wires. Set the latch back in place, place the panel back on and screw the screws back on using the Torx bit screwdriver.

Then, turn the power back on from the breaker so that you can test a cycle.


Replace a Blown Thermal Fuse

dishwasher thermal fuse

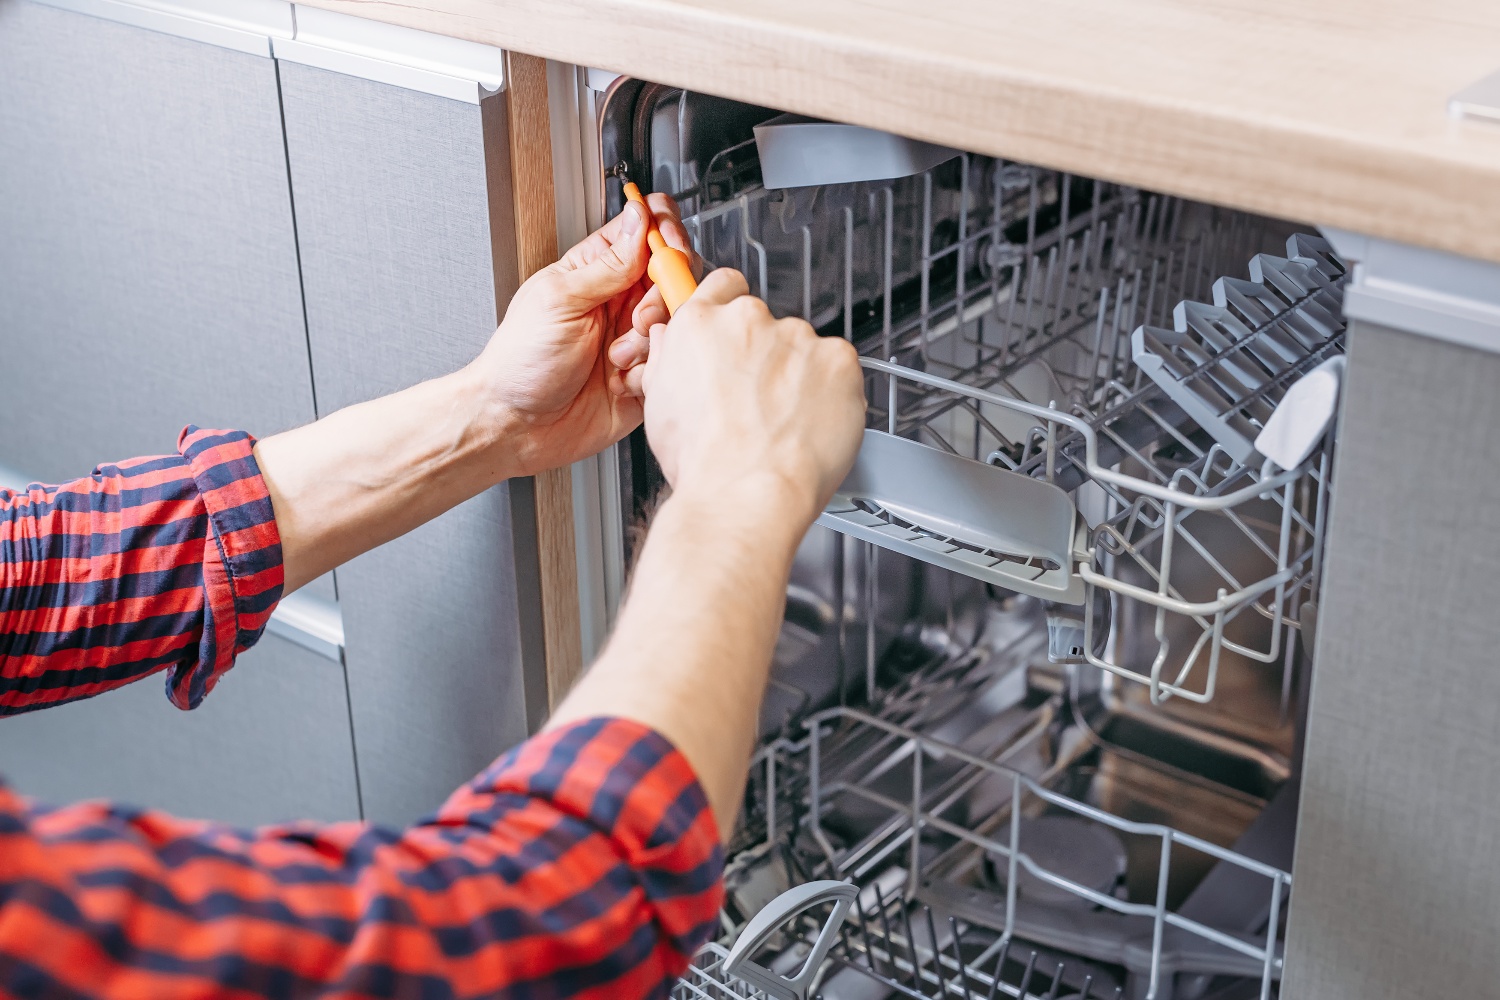
If the latch is properly working and the child lock isn’t on, it could potentially be a blown thermal fuse. When a dishwasher overheats, this can cause the thermal fuse to blow and prevent the appliance from starting as a safety measure.

To replace a thermal fuse, you will need the following supplies:

  • A Torx bit screwdriver

  • A replacement thermal fuse that matches with the dishwasher model that you have

First, you will need to shut off the power to the dishwasher from the breaker box. After the power is off, remove the screws from the inner door panel using your Torx bit screwdriver. Once all of the screws have been removed, you should be able to fold the control panel forward and down to access the thermal fuse. It’s not necessary to completely remove the panel.

Now, you will need to remove the thermal fuse from the control panel. To do this, push down on the release tab on the thermal fuse and pull forward and then out from the locking tabs.

You will then need to remove the wires (which will be on either side of the thermal fuse). To install the replacement, connect the wires to the new thermal fuse.

Place the thermal fuse underneath the locking tabs and then pop it back it into position. Fold the control panel back into place and reattach the door panel.

Finally, flip the breaker to power the dishwasher and test it out.


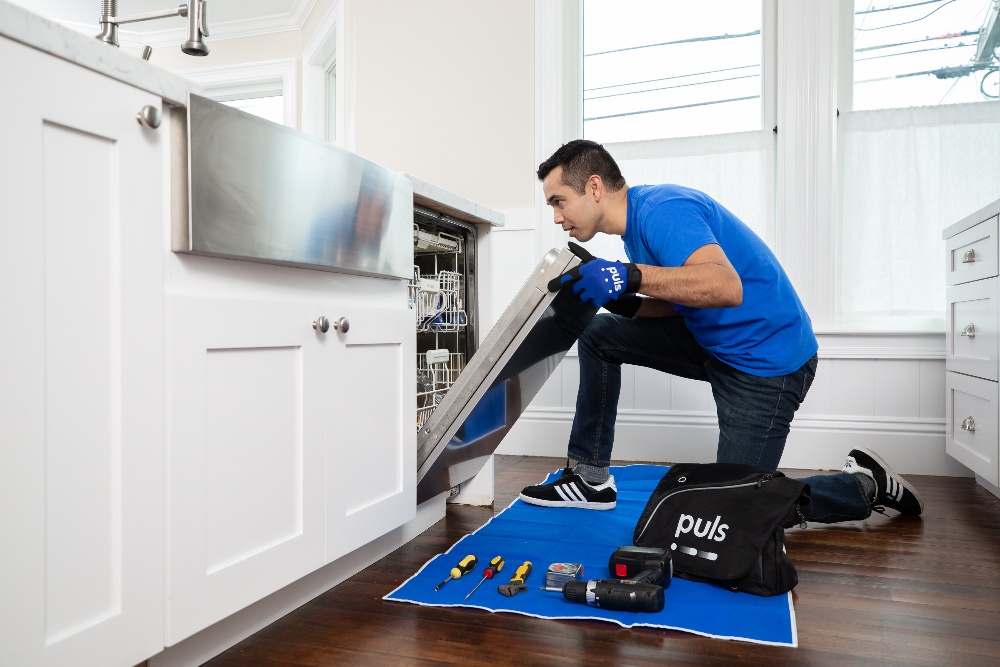
Stuck? Let Puls Take Care of It

Puls appliance repair

If you’ve tried these troubleshooting techniques and are still having problems with your dishwasher failing to start, Puls is here to help you sort it out. Book an appointment online and our savvy technicians can be there fast—even as soon as the same day—to get your dishwasher up and running once again.

We’ll come perform a full 25-step diagnostic on your door for just $79, and this fee is waived if you move forward with the repair. Best of all, our work has a 90-day guarantee on all of the parts and labor, which means that you never have to worry once the technician drives away.

Tired of washing your dishes by hand? We don’t blame you. Schedule an appointment with Puls today and get that dishwasher back in working order in no time - you’ll be glad you did.

Book an appliance repair

Jamie B.
Jamie Birdwell-Branson is a professional writer whose work has appeared on nationally-recognized sites, including Elle Decor, Zillow, BobVila.com, InStyle and others. She has been a Puls staff writer since 2018. When she's not writing for Puls she is either setting up Google alerts for flights to Europe, antiquing, or attempting to fix things in her 1940s Colonial-style house.
Related Posts

Home maintenance can feel overwhelming when it’s framed as one endless checklist. When everything seems important at once, it’s easy to delay action altogether and hope nothing urgent pops up. A room-by-room strategy makes home care feel more manageable. Instead of thinking about your home as one big project, you focus on individual spaces. This makes it easier to notice small changes, address issues early, and avoid the kind of problems that grow quietly over time. Kitchen: Where Wear and Tear Adds Up Fast Kitchens combine water, electricity, heat, and daily use, which naturally increases the chances of things wearing down. Under-sink leaks, loose outlets, and aging fixtures are common early warning signs. Because many kitchen components are tucked away inside cabinets, small problems often stay hidden until damage spreads. Catching these issues early keeps repairs simpler, faster, and far less expensive. Bathrooms: Constant Moisture, Constant Risk Bathrooms deal with daily humidity, which puts ongoing stress on plumbing connections, fixtures, and surfaces. Slow drains, loose faucets, or subtle discoloration around fixtures are often the first signs that something needs attention. Moisture-related issues rarely resolve on their own. Addressing them early helps prevent mold growth, water damage, and structural problems that can disrupt your home and budget. Living Areas: Subtle Signals Matter In living rooms and bedrooms, maintenance issues often show up visually or electrically. Small wall cracks, flickering lights, or loose mounted items can indicate settling, wiring wear, or anchor problems inside the walls. Because these changes happen gradually, they’re easy to normalize. Paying attention early keeps fixes straightforward and prevents damage from spreading behind the scenes. Entryways and Hallways: High Traffic, High Stress Doors, frames, and walls in high-traffic areas experience constant movement and pressure. Sticking doors or shifting frames can be early signs of alignment issues or normal structural movement that needs adjustment. Handling these issues early keeps everyday wear from turning into long-term damage that affects multiple rooms. Laundry Areas: Small Spaces, Big Impact Laundry hookups are one of the most common sources of unnoticed leaks. Hoses, valves, and drains wear down slowly, and even minor drips can lead to significant water damage if left unchecked. Because laundry areas are often out of sight, problems here tend to go unnoticed longer than they should. Regular inspection and timely service can prevent costly flooring and wall repairs. Why a Room-by-Room Approach Works Breaking maintenance down by room helps homeowners feel more in control of their home. It creates a natural rhythm for checking key areas without feeling like everything needs attention at once. This approach also makes it easier to prioritize. Rooms with water, electricity, or heavy use naturally deserve more frequent attention than low-impact spaces. How This Strategy Helps With Budgeting Room-based maintenance spreads costs out over time instead of letting them pile up into emergency repairs. Small, planned fixes are easier to budget for than sudden, expensive problems. Homeowners who take this approach often find they spend less overall—not because they avoid repairs, but because they handle them at the right moment. Peace of Mind Comes From Knowing What’s Normal When you check your home consistently, you start to recognize what’s normal and what’s new. That awareness makes it easier to spot issues early and take action without panic. Instead of wondering whether something has “always been like that,” you can make informed decisions with confidence. Where Professional Help Makes the Biggest Difference Professional technicians understand how issues in one room can affect the rest of the home. A trained eye can spot early warning signs that aren’t obvious to homeowners. Puls technicians can inspect multiple areas efficiently and handle repairs across rooms and systems, making it easier to stay ahead of maintenance without juggling multiple service providers. Why Proactive Service Is Easier Than Reactive Repairs Emergency repairs often come with stress, scheduling pressure, and limited options. Proactive service allows homeowners to plan repairs around their schedule and avoid last-minute decisions. Calling a Puls tech early helps keep home maintenance predictable, manageable, and far less disruptive. Consistency Beats Perfection Home care isn’t about fixing everything at once or chasing an ideal standard. It’s about steady attention and timely action. A professional-first, room-by-room approach keeps your home running smoothly, protects its value, and helps you avoid costly surprises down the line.

  • 5 min read
  • 05/04/26

Staying on top of home maintenance doesn’t have to feel like a constant project. Most homeowners don’t need more reminders—they need a simpler way to organize what already matters. That’s where a monthly home maintenance calendar comes in. Instead of reacting to issues or juggling long checklists, a calendar-based approach creates a steady rhythm that keeps your home running smoothly throughout the year. Why Monthly Planning Feels Easier Big seasonal lists tend to show up all at once and demand attention when life is already busy. Monthly planning spreads things out so nothing feels urgent or overwhelming. When you know exactly what to focus on each month, home care becomes more predictable—and much easier to fit into real life. How the Puls Home Maintenance Calendar Is Structured The Puls home maintenance calendar is designed to reduce mental load, not add to it. Each month focuses on just three types of tasks, keeping things clear and manageable: Quick Wins Seasonal Must-Dos Call in a Pro Tasks This structure ensures that important maintenance stays on track without turning home care into a full-time job. Quick Wins: Light Tasks That Keep Things on Track Quick wins are small, low-effort actions that help maintain comfort and performance around the home. They’re designed to be fast, easy to remember, and satisfying to complete. These tasks help homeowners feel like they’re staying ahead without committing large amounts of time or energy. Seasonal Must-Dos: Staying in Sync With the Year Every season brings small shifts in how a home is used. Seasonal must-dos help align your home with those changes in a calm, planned way. Because these tasks are anticipated in advance, they don’t come with urgency or stress. They simply support comfort, efficiency, and everyday use as the year progresses. Call in a Pro: Built-In Professional Support Some maintenance tasks are best handled by a professional—not because something is wrong, but because it’s easier and more reliable that way. Each month includes at least one Call in a Pro task, giving homeowners a clear moment to bring in expert help and keep things handled properly without guesswork. Puls technicians fit seamlessly into this system, handling professional tasks efficiently and helping homeowners stay consistent without juggling multiple providers. Why This System Reduces Stress With only three task types to think about, maintenance stays focused and manageable. There’s no pressure to do everything at once, and no feeling that something critical is being missed. Homeowners following a calendar-based approach often feel more confident simply because they know what’s coming next. Consistency Without Perfection This system doesn’t rely on doing everything perfectly. Missing a task one month doesn’t derail anything—the calendar simply brings your focus back the next month. That flexibility is what makes monthly maintenance sustainable and realistic over time. A Calmer, More Organized Way to Care for Your Home When maintenance is predictable and supported, it stops feeling like a chore. It becomes part of the background—quietly supporting comfort, safety, and daily life. A monthly home maintenance calendar turns home care into a steady rhythm, and with Puls technicians available for professional tasks, staying on top of your home feels simple, not stressful.

  • 4 min read
  • 03/23/26

Even in mild climates, decks and fences are exposed to the elements every day. Sunlight fades color and weakens coatings, humidity causes wood to expand and contract, and soil movement shifts posts and support beams. Over time, this wear and tear leads to cracks, discoloration, and loose boards that can compromise safety and appearance.

  • 12 min read
  • 10/28/25