
Nothing is quite as frustrating as when a garage door won’t close – from driving up your heating bill in the winter, to leaving your property vulnerable to theft and damage, a garage door that won’t shut is simply bad news.
The good news is, we’ve got an easy to follow guide on how to repair a garage door that won’t close in a flash. We take you step by step, from the easiest fix down to the most complex, so that you don’t waste any time. To that end, read on and get your garage door closing again!

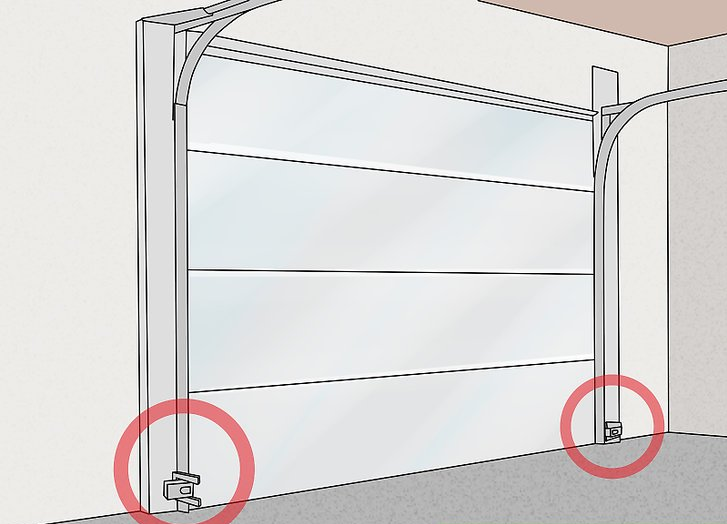
Check Your Safety Sensors
 Credit: WikiHow
While they may seem like a relatively small component in the grand scheme of things, your garage door safety sensors are actually the most likely culprit if your garage door won’t close. They’re also one of the easiest things to fix.
The sensors are located on either side of the garage door, a few inches above the ground. One sends a signal, and the other receives it. If something gets in the way of this signal, such as a child or pet, your garage door’s safety mechanism kicks in and it won’t shut.
The sensors have small LED lights to let you know when the signal is on and uninterrupted. That’s very helpful in finding out if they’re the reason your garage door won’t close. If the light is off, the sensor itself is probably off, and if the light is blinking, it means something is getting in the way of the signal.
Sometimes the sensor signal gets interrupted by accident, from things such as:
-
A dirty lens cover. Over time, dust and dirt can pile up on the lens cover, preventing the signal from sending or receiving properly. A simple dust off with a soft cloth will clear the signal’s path and allow the sender or receiver to function normally.
-
Sunlight hitting the lens. Check to see that there isn’t glare hitting the sensor by holding out your hand to block out sunlight and looking at the LED light. If it’s blinking, but gives a solid light when you block the sun, you can permanently fix the problem by using something such as PVC to shield it from the light. Feel free to get creative!
-
An unplugged or severed cable. Make sure the wires are securely connected and unbroken. Examine the connection all the way up to the garage door motor unit.
Track and Rollers
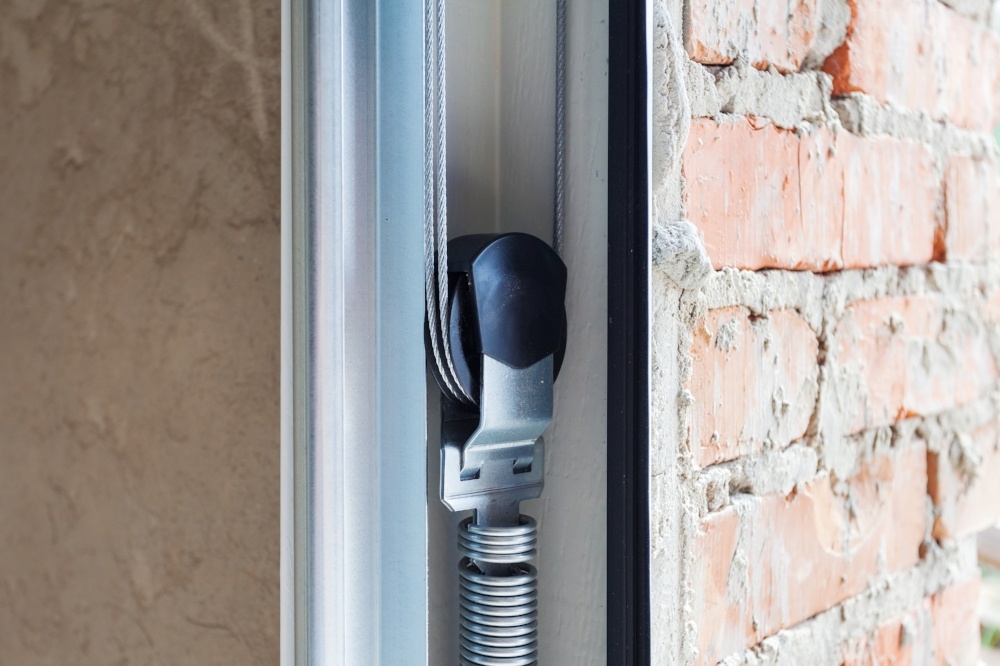
The rollers should be able to move smoothly up and down the metal track on the sides of your garage door, and should also have some slack between the roller and the wall of the track. Look to see that the track is straight, without any signs of bending where they may pinch the roller.
If the roller encounters any sort of resistance as the garage door comes down, it can cause the door to bounce back up again. One clear sign of this is if you see that the head of a bolt is scratched where the roller scrapes it as it comes down.
If you do come across a section of track that’s pinching the roller, simply loosen the bracket at that section, pull it outward slightly, and tighten it back up again. This should give the roller the clearance it needs.
Limit/Force Adjusting
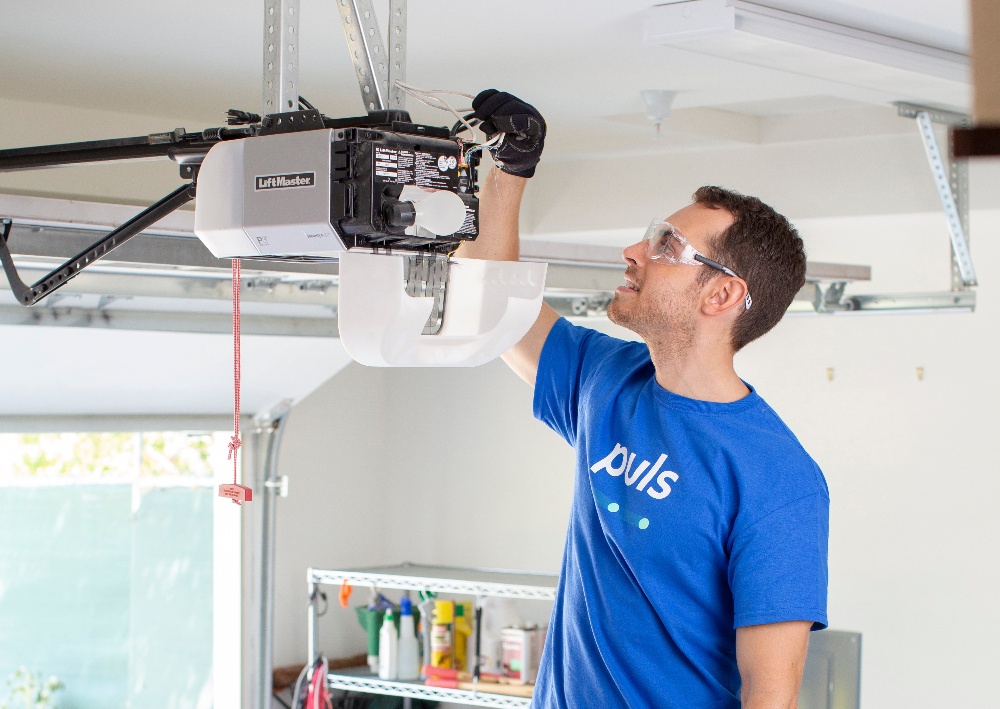 Your garage door motor unit has controls for both the distance that the door comes up or down, as well as the force with which it moves. These are called the limit and force adjusters, respectively.
If your garage door is not coming down all the way, or if you have a garage door closing and then bouncing back up, you may have to adjust your upward or downward limits. Be sure to read until the end and perform our safety test if you adjust the limit or force on your garage door.
Your limit adjusters are located on the side of your garage door motor unit, and can be altered by turning the screw-shaped adjuster. There’s one adjuster for the up limit, and another for the down limit. These change how much your garage door wants to open or close.
One turn of the screw clockwise will increase the upward or downward limit by about two inches, and one turn counterclockwise will decrease it by two inches. Note that if you do adjust one knob, you may have to take some time and fiddle with the others to achieve a perfect medium, so factor in that potential extra time.
If your garage door is not coming down all the way, hop up on a ladder and locate the limit adjusters on the side of the motor unit. Increase the downward limit by turning the screw clockwise. See if your door closes and adjust accordingly.
If you have a garage door closing and bouncing back up, do the same as above, but in reverse – decrease the down limit by turning the screw counterclockwise.
Bear in mind that with each adjustment, you must run the garage door opener for a complete up and down cycle. If you do this frequently, your motor may begin to overheat and will shut down for about 15 minutes to cool off.
Safety test
Your garage door has a safety feature designed to make it bounce open again if there is something in the way. This is a potentially life saving feature if a small child or pet gets caught beneath the door.
To ensure that this safety feature is working after you adjust the limit or force on your garage door, take a 2x4 board and lay it flat on the ground. Close your garage door and see if it bounces back up when it reaches the board.
If it does not, this poses a potential danger. To fix it, increase your down limit slightly and run the safety test again.
Puls can help
-1.jpg?width=1024&name=Image%20from%20iOS%20(11)-1.jpg)
Puls is your go-to for garage door repair. There’s no pressure, no hidden fees, and everything is as seamless and transparent as possible – you pay for your garage door repair only after the process is complete.
Simply hop online an book a garage door repair within seconds, and you can have someone at your door to fix it within the same day. Our skilled technicians will come perform a thorough, 25-step inspection of your door before you opt for a complete repair, to pinpoint exactly what the issue is, and give you a proper, adequate price quote.
Puls usually charges only $39 for this inspection – about half of what the competition charges. But if you choose to go ahead with a repair through us, we’ll waive the fee completely.
All of our parts and labor come backed by our 90-day guarantee, meaning that we’ll come back to you again should anything happen, for free, even long after your repair. Our skilled repair experts will bring all the necessary safety equipment, tools, and parts to you, so all you’ll have to do is sit back, relax and let us handle the rest - it’s really that easy.
So, what’re you waiting for? Book a garage door repair online to have our technicians come perform a thorough in-home diagnostic within the same day. You can even click here to get 5% off your first service with us.

