How to Easily Replace or Install a New Light Fixture

offer_banner_mobile
All Posts

If you’re in the dark about how to install a light fixture, set your worries aside—you can learn how to tackle this simple project in a flash, using just a few household tools. As long as there is the wiring in place from a pre-existing fixture, you don’t need a degree in engineering to install a new one. Just follow our simple step-by-step guide to light fixture illumination. 

Make Sure You Have These Tools in Your Belt 

How to install a light fixture: essential tools and supplies you need.If you’re learning how to install a light fixture in the ceiling, you’ll want a stepladder or another safe and stable method of reaching the ceiling. Besides that, you will need:

  • Your new light fixture, with the included bracket, also called a baseplate or guideplate. If you’re also removing the old fixture, this bracket may be a single bar with a screw in the middle. The new bracket will most likely be round, with a screw on either side.
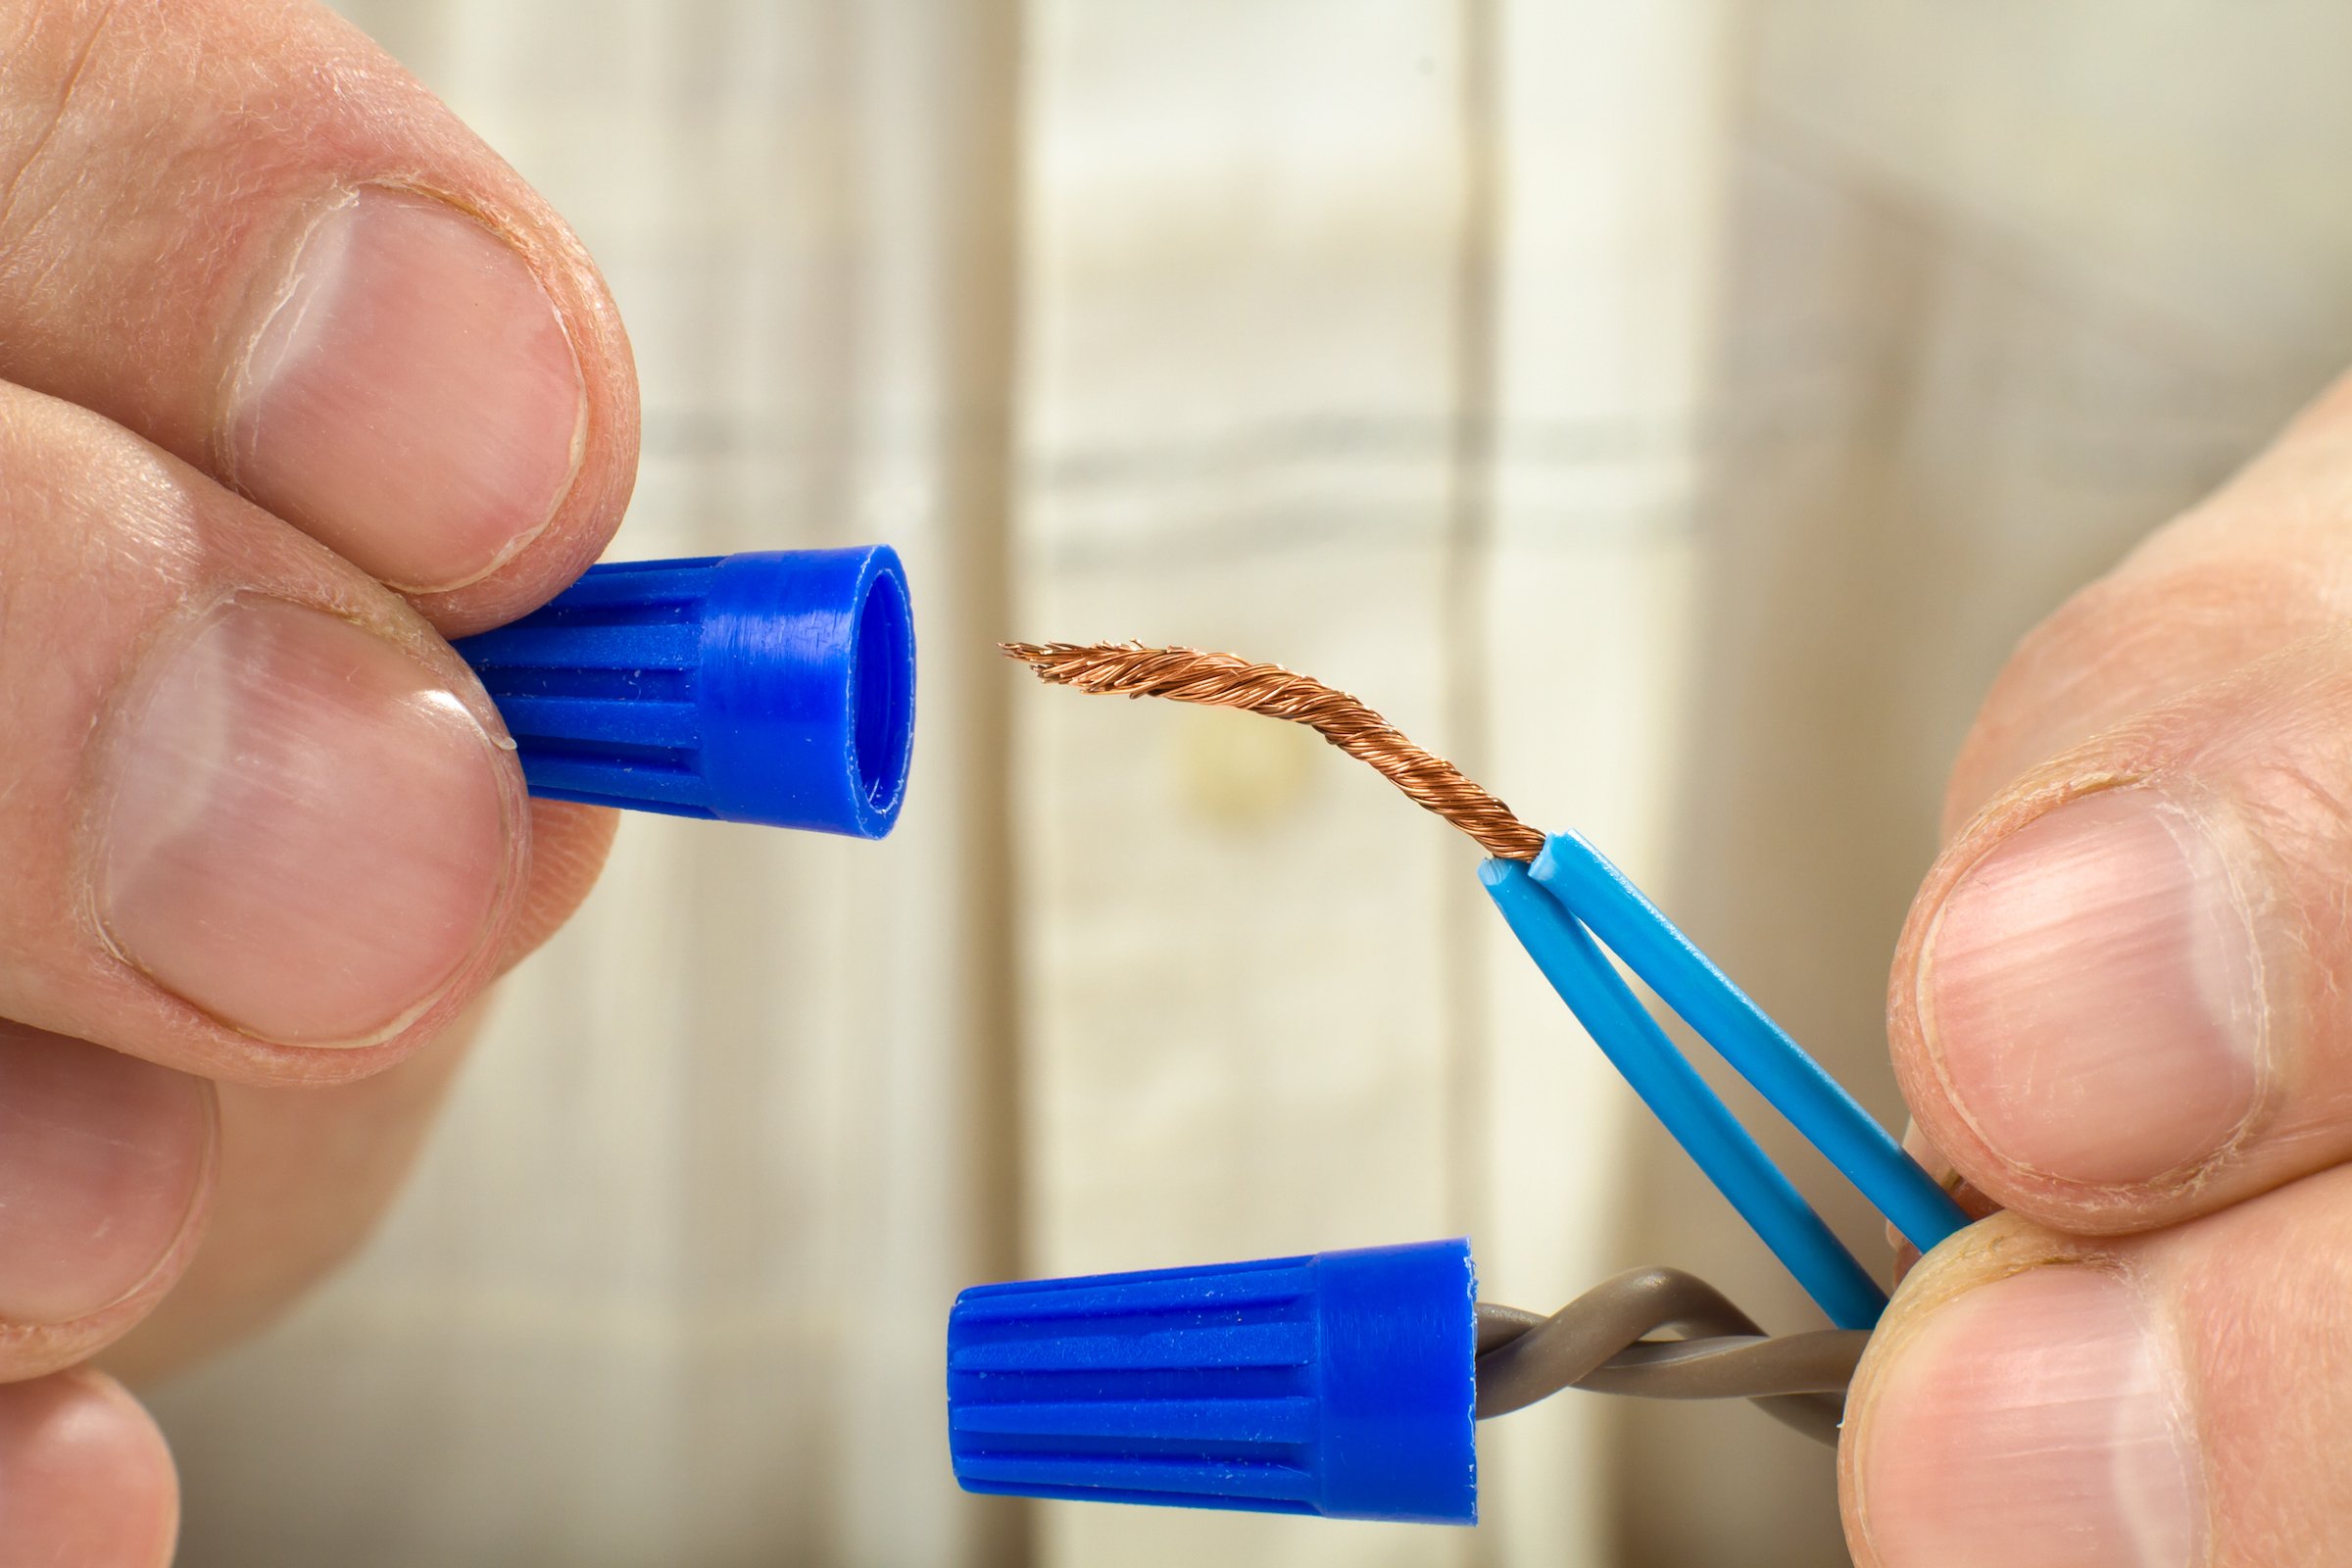
  • Plastic wire nuts to cover the wires
  • Electrical tape
  • A screwdriver
  • It is helpful to have a friend (or any other unsuspecting good Samaritan) around to lend a hand when installing the fixture, but in a bind, this can be performed on your own. 

How to Install a Light Fixture, Step-by-Step 

How to install a light fixture, step-by-stepNow we’ll show you how to install a light fixture. If there was already a fixture in place that needs to be removed, then follow these first steps:

  • Before doing anything, ensure that the power is off at the circuit box. 
  • If there is a working light bulb in place, turn the light on before disconnecting power at the circuit box. When the light bulb goes off, you can be sure the power is off. Otherwise, double-check that the circuit you shut definitely corresponds to the power supply for the light fixture. 
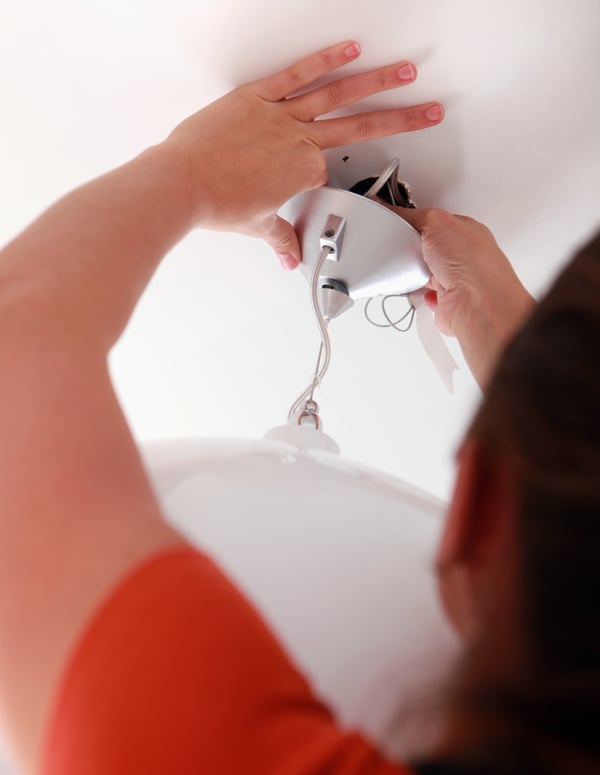
  • Once you’ve established that the power is disconnected, take the canopy off the fixture to access the wiring and electrical box. The canopy is the outer covering that keeps all the less visually-appealing hardware in place. Each one’s a little different, but should be relatively easy to unscrew and remove. 
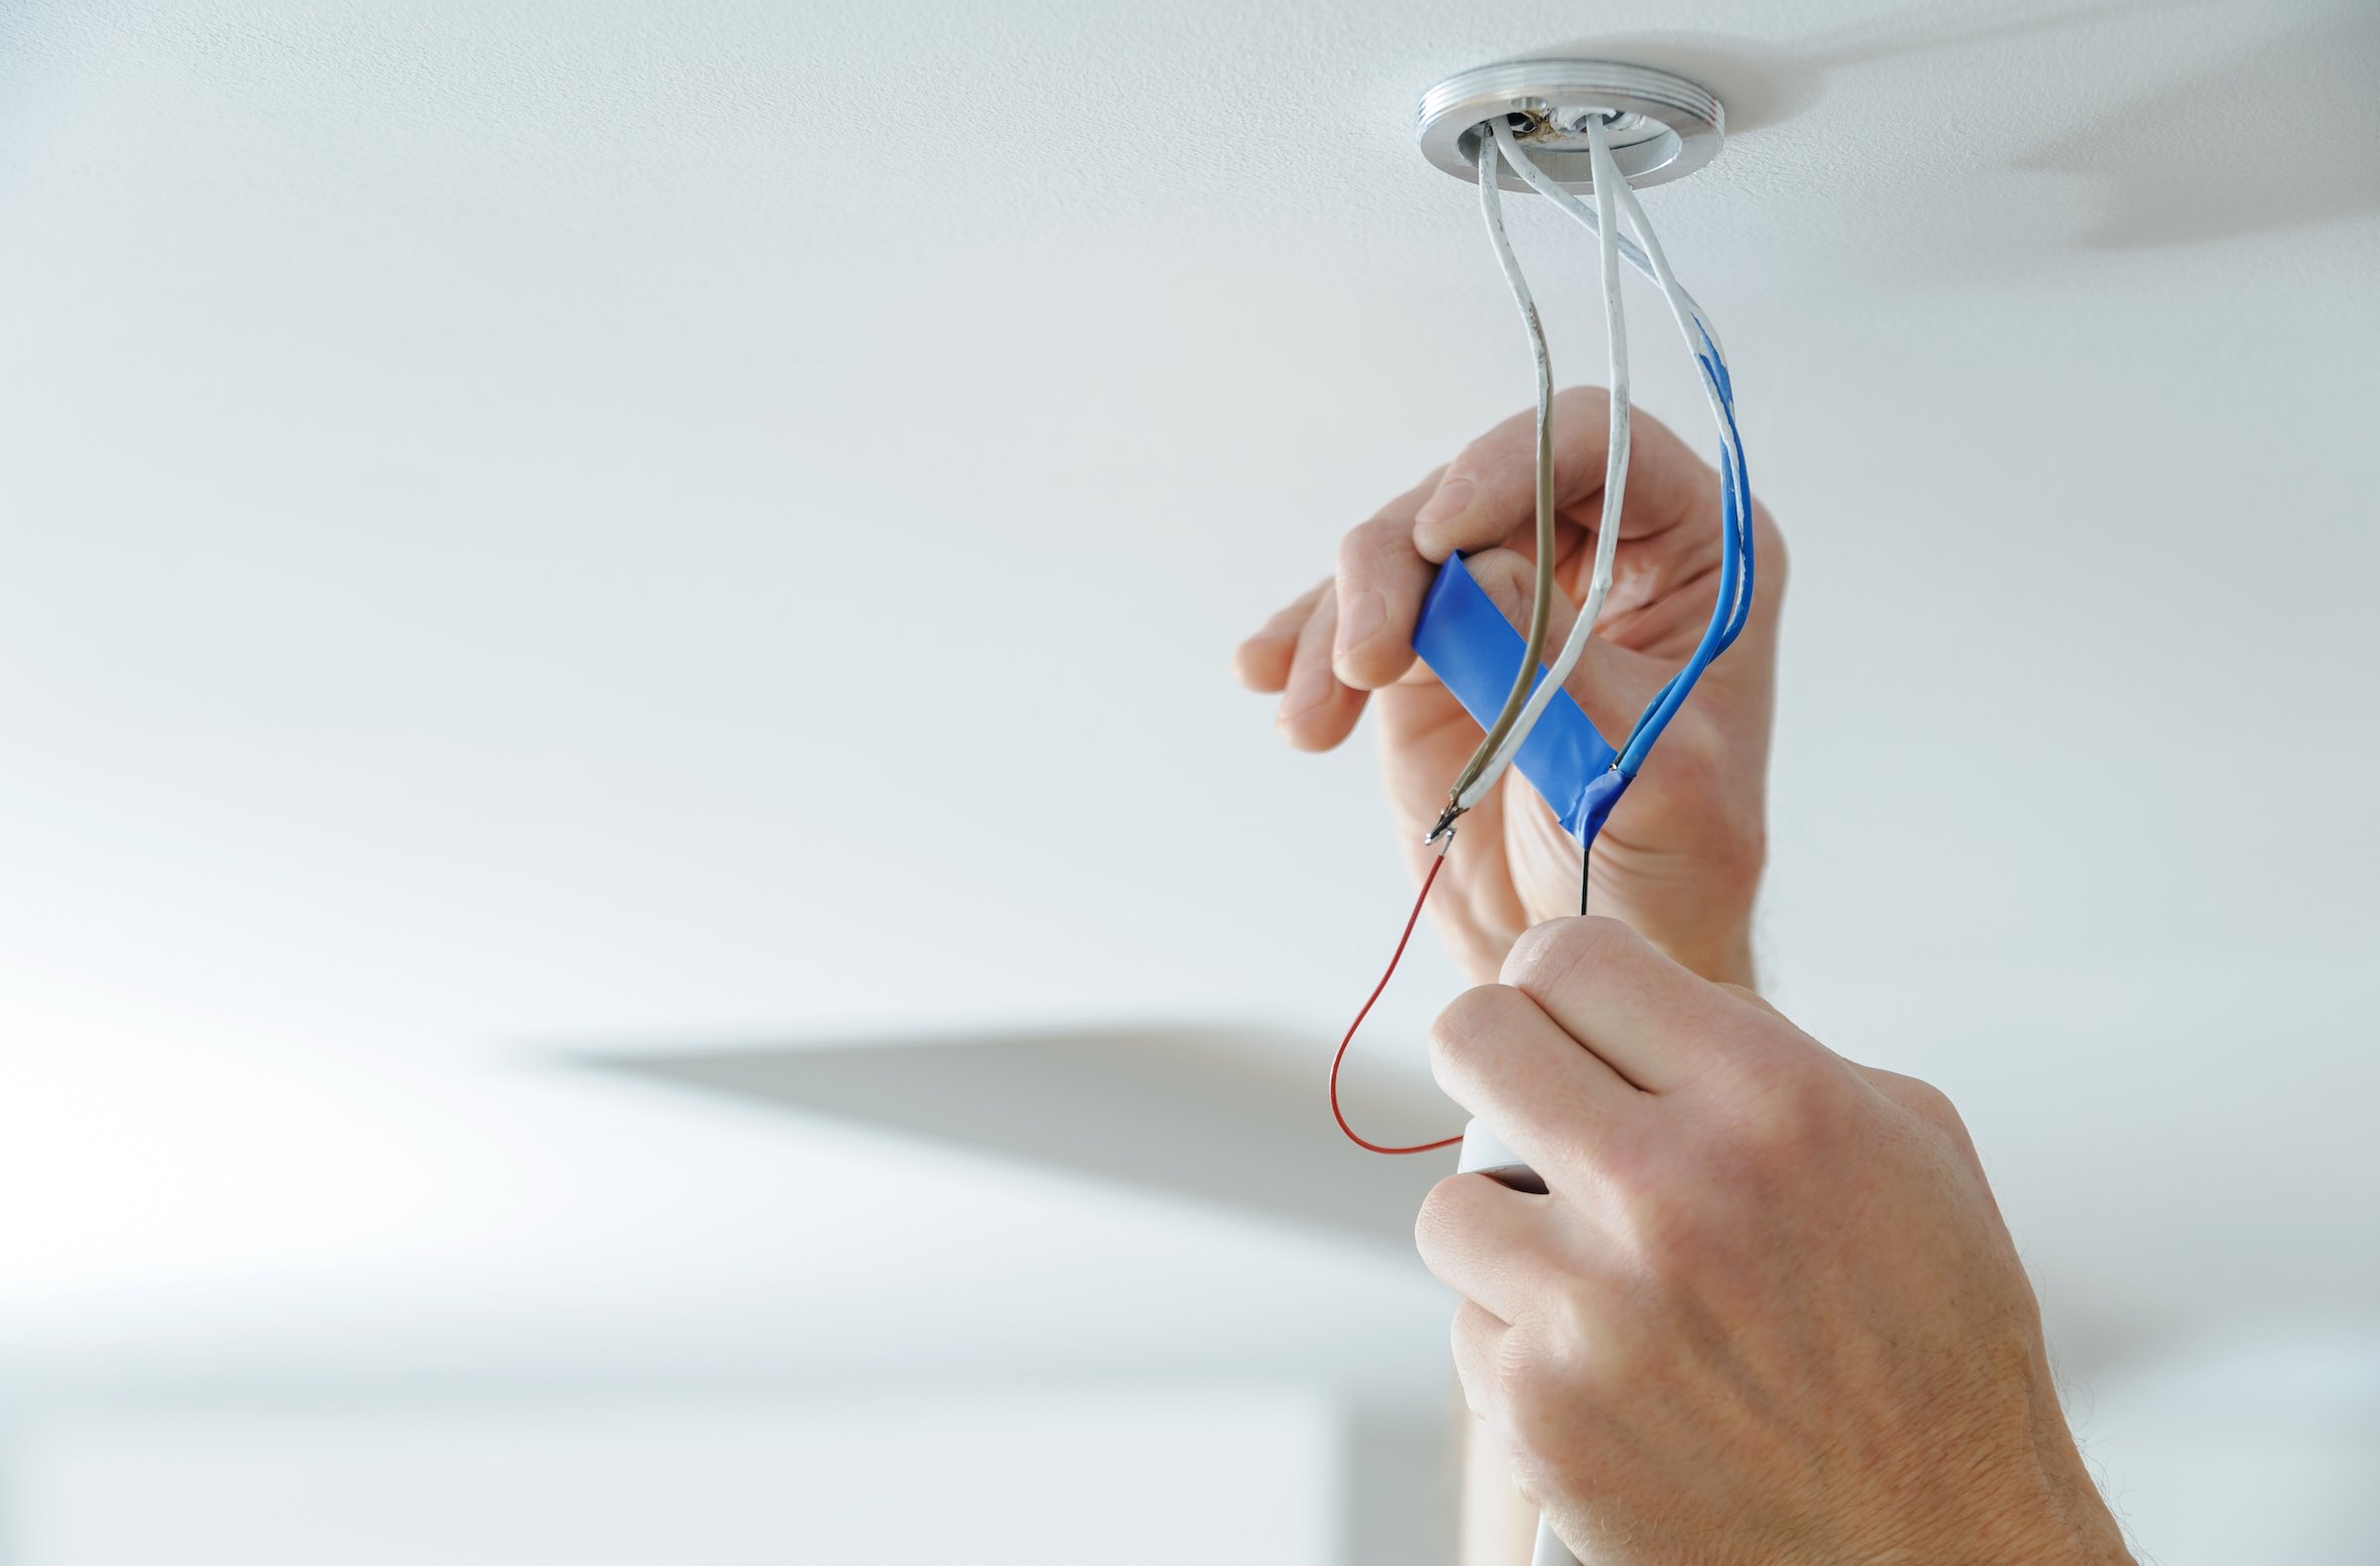
  • There should be just three wires connecting the old fixture to the electrical box – black, white, and a ground wire, which will be either green or bare copper. 

    One step in how to install a light fixture is to remove the plastic wire nuts from the wires.
  • Unscrew the plastic wire nuts around the wire connections, and then untwist the wires to disconnect them from the ceiling wiring leading up into the electrical box.
  • Unscrew the fixture from the bracket that’s in place. Your old fixture should now be freed up to set aside. Disconnect the bracket itself by unscrewing it and detaching it from the electrical box. 

Once the old light fixture is out of the way, or if you want to install a new light fixture and don’t need to worry about removing the old one, proceed as follows:

  • Disconnect power to the light fixture as described above.
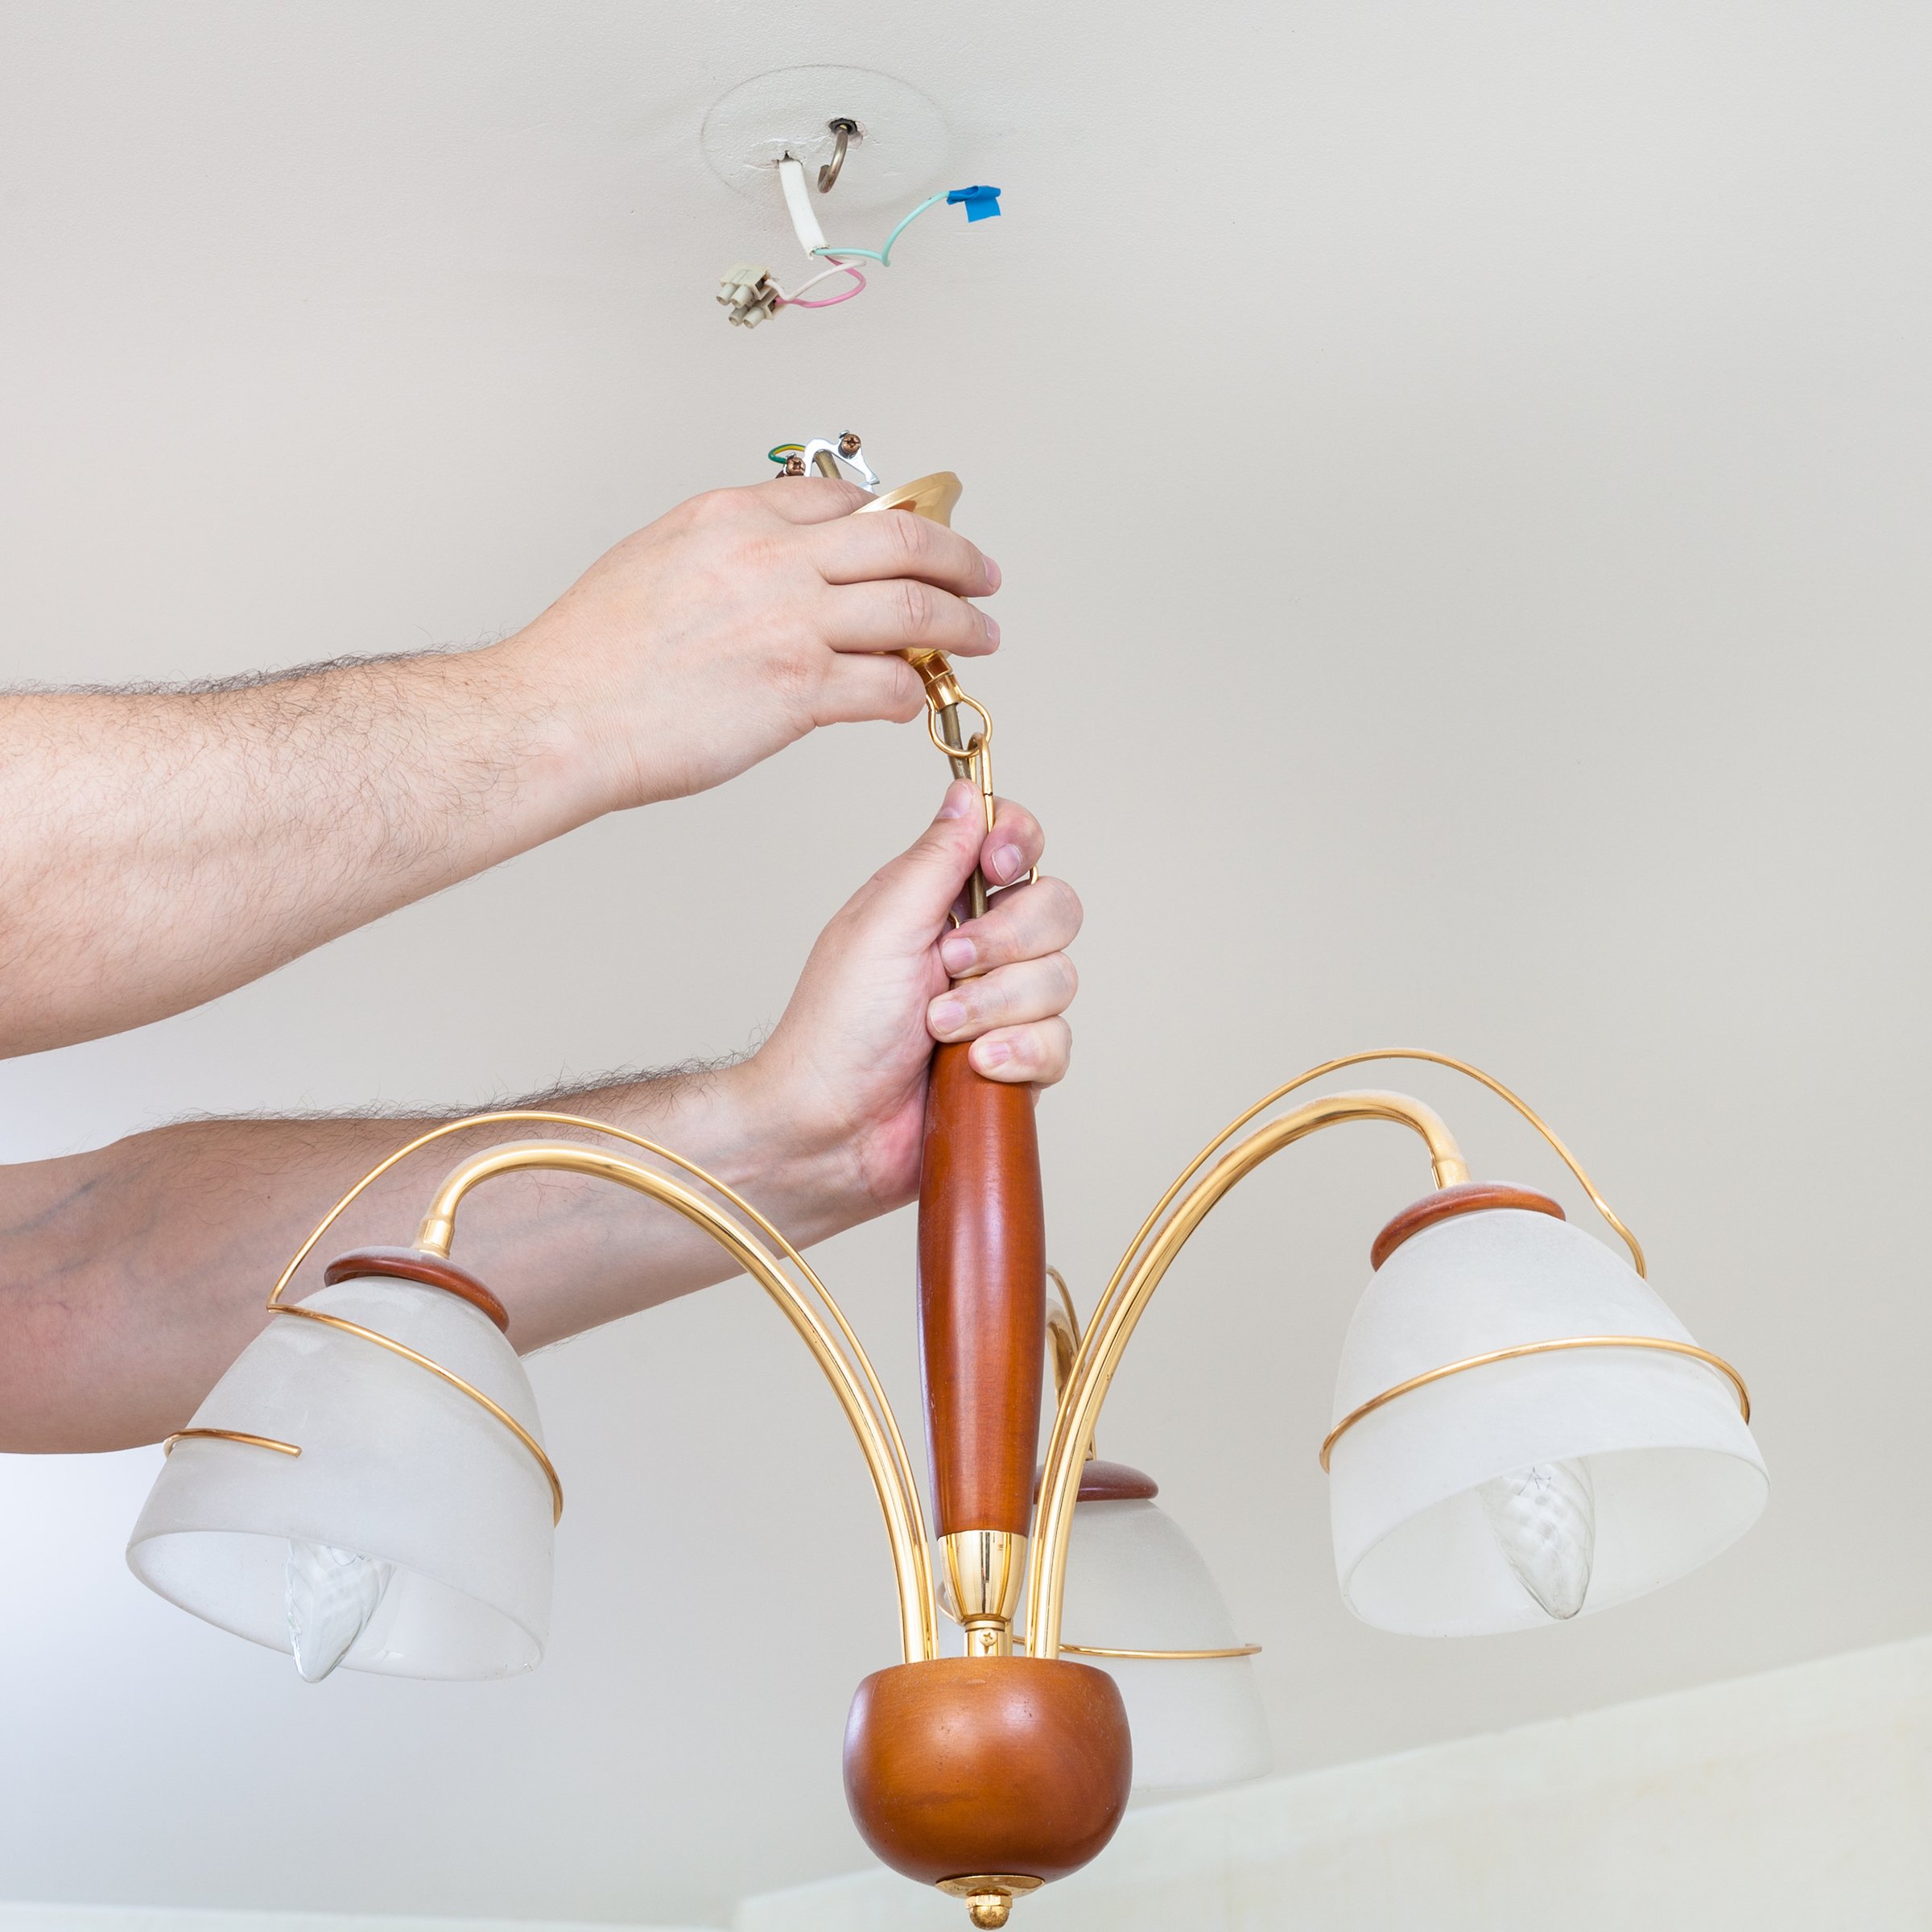
  • Get your new circular bracket in hand and stick the three wires through the middle. Then, connect it to the electrical box by screwing in the screws on either side of the bracket. The electrical box is securely installed, so all you need to do is make sure the bracket is well-attached to it. 
  • Now, connect each of the three ceiling wires to the corresponding wire on your new light fixture by twisting the ends together. Place the wire nuts over the twisted ends, and screw on. For added safety, wrap electrical tape around the wire nuts and over the ends of the wires, so that the wires stay snugly tucked into the wire nuts. 
    To install your new light fixture, feed all wires into the electrical box.
  • Feed all the wiring up into the electrical box. This is especially important because the electrical box provides a fire-proof environment in case any of the wires send off a spark, so make sure that all the wiring is really in there. 
  • Once the wiring is all safely inside the electrical box, you can attach the canopy to your bracket. You can follow the manufacturer’s instructions, but in most cases the canopy is connected with just a couple of screws. 
  • Test your new light fixture and bask in the glory of a job well done.

Puls Can Install a New Light Fixture as Soon as Same Day

If our tips on how to install a light fixture inspired you to call the professionals, Puls can help!Photo by Michael Browning on Unsplash

Installing a new light fixture isn’t always as easy as it sounds – especially if you’re installing a new light fixture where there wasn’t one before. Running the new wiring can require a licensed electrician for safety and legal reasons. 

Fortunately, we’re rapidly expanding our handyman service area, and that means we’re providing more electrical installations to satisfied customers every day.

We also offer a full array of electric appliance repairs nationwide. We fix washers, dryers, refrigerators, ovens, and more, and, with our easy online booking, you can schedule a time slot in just moments – usually for that very same day. And with our 90-day guarantee on parts and labor, you can be sure the job is done right.

So, what are you waiting for? Have a certified Puls technician brighten your day with a new light fixture!

Learn More About Puls Handyman Services

Jake S.
Jake Sherman is a professional writer with a background in journalism. He is fascinated by home appliances and how they work. He enjoys breaking down complex topics and explaining them in interesting ways. He has been a Puls staff writer for two years. When he's not writing, he enjoys trotting around the globe, trying unfamiliar foods, and testing unmarked doors to see if they're locked.
Related Posts

Home maintenance can feel overwhelming when it’s framed as one endless checklist. When everything seems important at once, it’s easy to delay action altogether and hope nothing urgent pops up. A room-by-room strategy makes home care feel more manageable. Instead of thinking about your home as one big project, you focus on individual spaces. This makes it easier to notice small changes, address issues early, and avoid the kind of problems that grow quietly over time. Kitchen: Where Wear and Tear Adds Up Fast Kitchens combine water, electricity, heat, and daily use, which naturally increases the chances of things wearing down. Under-sink leaks, loose outlets, and aging fixtures are common early warning signs. Because many kitchen components are tucked away inside cabinets, small problems often stay hidden until damage spreads. Catching these issues early keeps repairs simpler, faster, and far less expensive. Bathrooms: Constant Moisture, Constant Risk Bathrooms deal with daily humidity, which puts ongoing stress on plumbing connections, fixtures, and surfaces. Slow drains, loose faucets, or subtle discoloration around fixtures are often the first signs that something needs attention. Moisture-related issues rarely resolve on their own. Addressing them early helps prevent mold growth, water damage, and structural problems that can disrupt your home and budget. Living Areas: Subtle Signals Matter In living rooms and bedrooms, maintenance issues often show up visually or electrically. Small wall cracks, flickering lights, or loose mounted items can indicate settling, wiring wear, or anchor problems inside the walls. Because these changes happen gradually, they’re easy to normalize. Paying attention early keeps fixes straightforward and prevents damage from spreading behind the scenes. Entryways and Hallways: High Traffic, High Stress Doors, frames, and walls in high-traffic areas experience constant movement and pressure. Sticking doors or shifting frames can be early signs of alignment issues or normal structural movement that needs adjustment. Handling these issues early keeps everyday wear from turning into long-term damage that affects multiple rooms. Laundry Areas: Small Spaces, Big Impact Laundry hookups are one of the most common sources of unnoticed leaks. Hoses, valves, and drains wear down slowly, and even minor drips can lead to significant water damage if left unchecked. Because laundry areas are often out of sight, problems here tend to go unnoticed longer than they should. Regular inspection and timely service can prevent costly flooring and wall repairs. Why a Room-by-Room Approach Works Breaking maintenance down by room helps homeowners feel more in control of their home. It creates a natural rhythm for checking key areas without feeling like everything needs attention at once. This approach also makes it easier to prioritize. Rooms with water, electricity, or heavy use naturally deserve more frequent attention than low-impact spaces. How This Strategy Helps With Budgeting Room-based maintenance spreads costs out over time instead of letting them pile up into emergency repairs. Small, planned fixes are easier to budget for than sudden, expensive problems. Homeowners who take this approach often find they spend less overall—not because they avoid repairs, but because they handle them at the right moment. Peace of Mind Comes From Knowing What’s Normal When you check your home consistently, you start to recognize what’s normal and what’s new. That awareness makes it easier to spot issues early and take action without panic. Instead of wondering whether something has “always been like that,” you can make informed decisions with confidence. Where Professional Help Makes the Biggest Difference Professional technicians understand how issues in one room can affect the rest of the home. A trained eye can spot early warning signs that aren’t obvious to homeowners. Puls technicians can inspect multiple areas efficiently and handle repairs across rooms and systems, making it easier to stay ahead of maintenance without juggling multiple service providers. Why Proactive Service Is Easier Than Reactive Repairs Emergency repairs often come with stress, scheduling pressure, and limited options. Proactive service allows homeowners to plan repairs around their schedule and avoid last-minute decisions. Calling a Puls tech early helps keep home maintenance predictable, manageable, and far less disruptive. Consistency Beats Perfection Home care isn’t about fixing everything at once or chasing an ideal standard. It’s about steady attention and timely action. A professional-first, room-by-room approach keeps your home running smoothly, protects its value, and helps you avoid costly surprises down the line.

  • 5 min read
  • 05/04/26

Staying on top of home maintenance doesn’t have to feel like a constant project. Most homeowners don’t need more reminders—they need a simpler way to organize what already matters. That’s where a monthly home maintenance calendar comes in. Instead of reacting to issues or juggling long checklists, a calendar-based approach creates a steady rhythm that keeps your home running smoothly throughout the year. Why Monthly Planning Feels Easier Big seasonal lists tend to show up all at once and demand attention when life is already busy. Monthly planning spreads things out so nothing feels urgent or overwhelming. When you know exactly what to focus on each month, home care becomes more predictable—and much easier to fit into real life. How the Puls Home Maintenance Calendar Is Structured The Puls home maintenance calendar is designed to reduce mental load, not add to it. Each month focuses on just three types of tasks, keeping things clear and manageable: Quick Wins Seasonal Must-Dos Call in a Pro Tasks This structure ensures that important maintenance stays on track without turning home care into a full-time job. Quick Wins: Light Tasks That Keep Things on Track Quick wins are small, low-effort actions that help maintain comfort and performance around the home. They’re designed to be fast, easy to remember, and satisfying to complete. These tasks help homeowners feel like they’re staying ahead without committing large amounts of time or energy. Seasonal Must-Dos: Staying in Sync With the Year Every season brings small shifts in how a home is used. Seasonal must-dos help align your home with those changes in a calm, planned way. Because these tasks are anticipated in advance, they don’t come with urgency or stress. They simply support comfort, efficiency, and everyday use as the year progresses. Call in a Pro: Built-In Professional Support Some maintenance tasks are best handled by a professional—not because something is wrong, but because it’s easier and more reliable that way. Each month includes at least one Call in a Pro task, giving homeowners a clear moment to bring in expert help and keep things handled properly without guesswork. Puls technicians fit seamlessly into this system, handling professional tasks efficiently and helping homeowners stay consistent without juggling multiple providers. Why This System Reduces Stress With only three task types to think about, maintenance stays focused and manageable. There’s no pressure to do everything at once, and no feeling that something critical is being missed. Homeowners following a calendar-based approach often feel more confident simply because they know what’s coming next. Consistency Without Perfection This system doesn’t rely on doing everything perfectly. Missing a task one month doesn’t derail anything—the calendar simply brings your focus back the next month. That flexibility is what makes monthly maintenance sustainable and realistic over time. A Calmer, More Organized Way to Care for Your Home When maintenance is predictable and supported, it stops feeling like a chore. It becomes part of the background—quietly supporting comfort, safety, and daily life. A monthly home maintenance calendar turns home care into a steady rhythm, and with Puls technicians available for professional tasks, staying on top of your home feels simple, not stressful.

  • 4 min read
  • 03/23/26

Even in mild climates, decks and fences are exposed to the elements every day. Sunlight fades color and weakens coatings, humidity causes wood to expand and contract, and soil movement shifts posts and support beams. Over time, this wear and tear leads to cracks, discoloration, and loose boards that can compromise safety and appearance.

  • 12 min read
  • 10/28/25