The fact is, some appliances are simpler to fix than others. Oven repair does tend to fall on the trickier side of the spectrum – which is understandable, because you’re dealing with components such as gas lines and electric heating elements designed to get searing hot.
That’s not to say that DIY stove repair is impossible – but more often than not, it’s a good idea to leave these types of repairs to the professionals.
Still, knowledge is power, and whether you’re doing the repair yourself or simply keeping an eye on what your technician is up to, it never hurts to know how to fix an oven yourself. Gas and electric stoves are a little bit like apples and oranges, so when we show you how to fix a stove, we address the issue most common to each type individually.
Attempting stove repair on your own can pose a serious safety risk - if you are not fully confident in your knowledge of these repairs, we recommend you contact a professional. The following guide is for educational purposes only.

Gas Stove Repair: How to Fix an Igniter
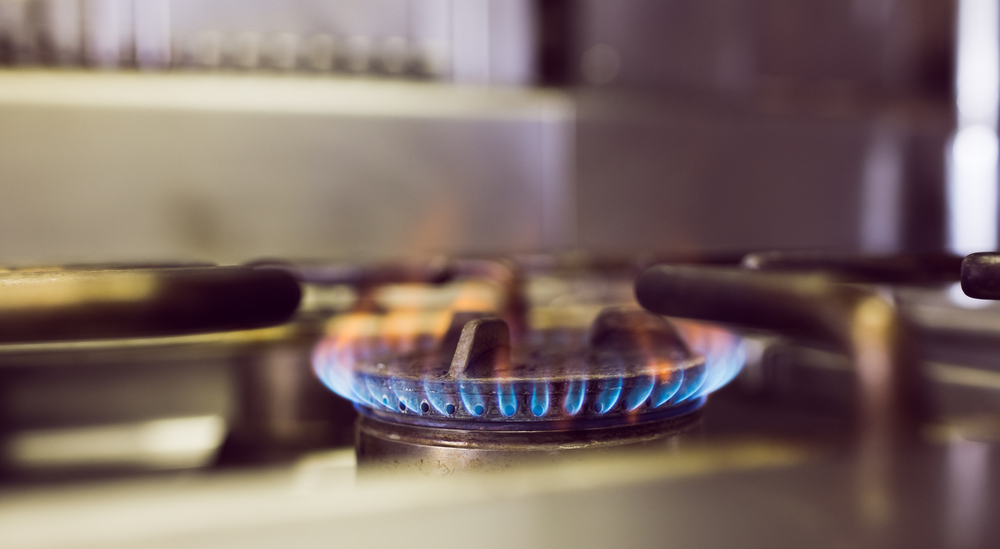 The number one reason for a gas stove not heating up is that the igniter is broken. A faulty igniter will not send a strong enough electric current to light up the gas fire, which sets your oven to warming.
While the igniter itself isn’t technically difficult to replace, finding the right model number for your oven can be a challenge. It can also be difficult to remove the necessary oven paneling.
Here’s how to diagnose the issue and replace a gas oven igniter.
You’ll need:
A clamp meter and Phillips-head screwdriver.
-
Remove any metal plates to allow access and locate the igniter, usually in the broiler drawer at the bottom of the oven. The igniter has two white wires, and is attached to the burner tube where the gas flame comes out. Remove the additional metal cover protecting the igniter, if necessary.
-
Read the igniter to see how many amps are required to close the circuit and light the flame.
-
Clamp the clamp meter around only one of the igniter wires. Turn on the oven and check the meter. If it’s not registering enough amps to get the igniter going, then the igniter will need to be replaced.
To replace the igniter:
-
Unplug the oven (or, if the plug is not easily accessible, shut the circuit breaker supplying power to the oven) and turn off the gas valve. Attempting this repair without shutting off the electricity and gas can be extremely dangerous.
-
Remove the plates to expose the burner assembly and the igniter.
-
Unscrew the igniter. It may be connected to a connector through the back of the oven, in which case it is necessary to pull the oven away from the wall, remove any plating to gain access, and disconnect the connector, as well. This will free up the igniter to be replaced.
-
Reassemble and run the connector wire through the back of the oven, if necessary.
-
Test out the stove to see if it’s working.
Electric Oven Repair: How to Replace a Heating Element
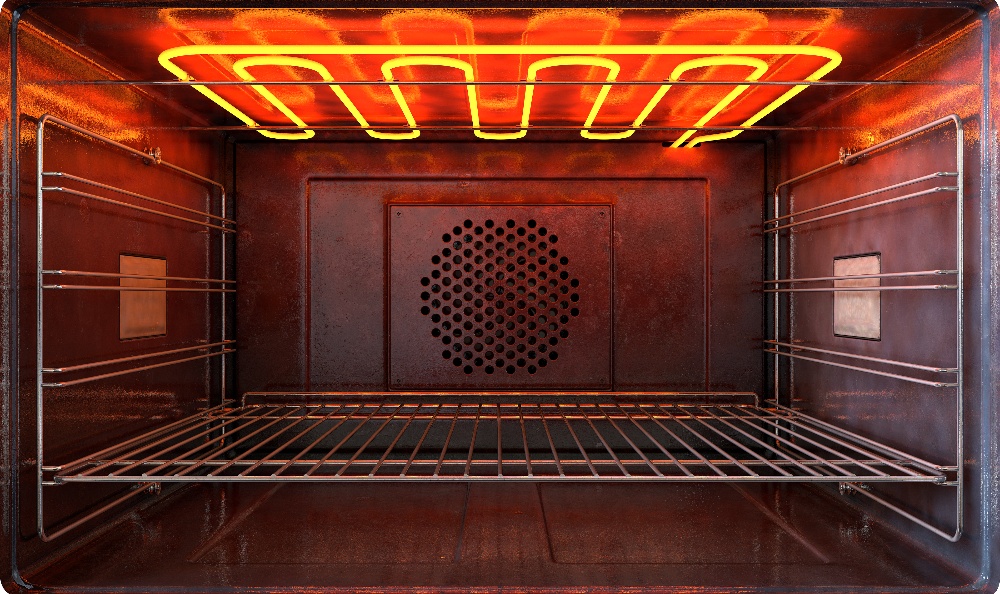 If your electronic oven isn’t heating, one of the first culprits to be on the lookout for is a malfunctioning heating element – the coil that gets red hot and warms your oven up.
While you could remove the heating element and test it with a meter to see that the current is running all the way through it, diagnosing a broken heating element is often easier than that. If you turn the oven on and it’s not warming up and turning red, a quick visual inspection could reveal breaks or blisters.
Touching a blistered section even lightly could cause it to snap. If it does, don’t worry – it was most likely already broken.
You’ll need:
A socket wrench or nut driver.
-
Pull the oven away from the wall and disconnect the power.
-
Remove the back panel of the oven by unscrewing the screws holding it in place and unhinging it from any clips holding it in. The oven wiring should now be exposed.
-
Follow the wiring to where it attaches to the heating element – you will see that connectors attach the wires along the back of the oven to the element inside. Pull the metal connectors apart to detach the wiring from the element.
-
From inside the oven, loosen the nuts that bolt the element to the oven wall, and pull the element free.
-
Install the new element, bolt it to the oven wall, and reconnect the wiring in back.
We Can Perform Your Oven and Stove Repair in No Time
-1.jpg?width=1000&name=20181204-Puls-0007%20(1)-1.jpg) We specialize in stove and oven repair, so if you want your oven fixed quickly, reliably, and in time for you to get dinner on the table, you can count on us. Just hop online to book the time slot that’s best for you, and a certified Puls technician will arrive at your door – often in just a matter of hours – to fully diagnose your broken oven.
We specialize in stove and oven repair, so if you want your oven fixed quickly, reliably, and in time for you to get dinner on the table, you can count on us. Just hop online to book the time slot that’s best for you, and a certified Puls technician will arrive at your door – often in just a matter of hours – to fully diagnose your broken oven.
Plus, if you choose to go ahead with a repair, we will throw in our comprehensive $79 diagnostic for free. Visit our website today and you can save 5% off your first service with us.
We fix washers, dryers, refrigerators, and more. And with our 90-day guarantee on parts and labor, you can be sure the job is being done right the first time, and you’ll be covered long after.
So, what are you waiting for? Book an appointment now to have a certified Puls technician get your oven back to full power in no time.