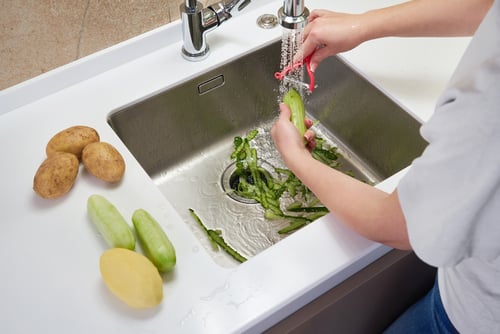
One of modern technology’s most efficient appliances, the garbage disposal makes kitchen clean-ups fast and easy. A garbage disposal fits its name perfectly as it was designed to dispose of garbage. Located under the kitchen sink, the unit is connected to the sink drain and cuts small food waste into even smaller pieces so it will easily pass through the plumbing system.
So, how exactly does a garbage disposal work, and what can you do if your garbage disposal is not working?
How a Garbage Disposal Works
A disposal uses a small electrical motor to turn a blade (or lugs mounted on a steel plate) that chops food and other waste put into the grinding chamber. An impeller pushes the particles down the drain where they mix with water to efficiently pass through the pipes to the sewer.
Dishwashers are also connected to the garbage disposal so any food residue will be ground smaller and move through the system without any issues.
Best Ways to Use a Garbage Disposal
While you may think that using a garbage disposal is as simple as flipping a switch, there is definitely a right way and wrong way to operate this convenient appliance. Don’t risk damaging your disposal and plumbing system with improper use. Follow these important guidelines:
- Turn on the faucet before you turn the power on. Clogs can occur if you don’t have running water to help move the waste down the drain.
- Make sure the water is cold. This will keep any grease or fat in solid form to grind and flush away. Hot water will keep grease and fat in liquid form that can clog the drain and pipes further down.
- Feed small amounts of waste at once. Overloading or forcing too large of pieces into the disposal can clog or damage the appliance.
- Fully grind everything you put into the disposal. This will help avoid buildups and damage. After the final piece of garbage is ground up, run the unit and water for an additional 30 seconds.
- Clear the sink before grinding. Often people leave dishes and silverware in the sink while running the disposal. These items will damage the garbage disposal blades if accidentally pushed into the unit.
- Avoid waste that will clog or damage your disposal. There is a list of items you should not put down your disposal as they can lead to jams, clogs or damage. Stay away from things like potato peels, rice, pasta, animal bones, grease and fat.
 Common Signs That a Garbage Disposal Isn’t Working
If you’re handy, you may want to try to troubleshoot problems with your appliance. These common signs will help you narrow down and diagnose the problem:
- Disposal not working; no noise.
- Garbage disposal hums or is jammed.
- Disposal grinds poorly.
- Machine is clogged; not draining.
- Garbage disposal leaks (from top or from bottom)
If your disposal is experiencing any of these issues, you’ll want to assemble the proper tools to fix it.
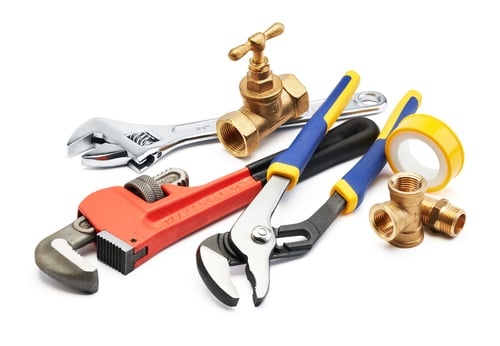
Things You’ll Need to Fix Your Garbage Disposal
- Screwdriver sets
- Hex key
- Garbage disposal wrench
- Flashlight
- Long-nosed pliers
- Clamp
- Bucket
- Plunger
 Steps to Fix Garbage Disposal Problems
Garbage Disposal Not Working, No Noise
When your disposal has completely stopped working, the first thing to check is the electrical connection.
- Make sure it is plugged in.
- Press the reset button on the bottom of the disposal, then try to turn on the switch again.
- Check the circuit breaker to be sure it hasn’t been tripped.
- If you still have a problem, it could be the wiring. You’ll want to consult with a professional appliance repair service.
Garbage Disposal Hums or Is Jammed
When your disposal hums but isn’t grinding, the impeller is probably jammed. You’ll need to manually turn the impeller to free it up.
- Turn off the wall switch and unplug the unit. If direct-wired, turn off the circuit breaker to prevent electrocution.
- Insert the disposal wrench into the flywheel hole on the bottom side, turn the wrench clockwise to free up the jam.
- You can also use a wood spoon handle from the top (through the drain) to free up the impeller.
Disposal is Grinding Poorly
Without actual blades to sharpen, the only alternative to solve poor grinding is to clean the grind ring. Build-up of food and waste in the teeth will make the disposal ring seem dull. Your disposal may also develop an unpleasant odor. Clean the grind ring with one of these methods:
- Ice cubes and salt—throw 8 to 10 ice cubes into the disposal along with a handful of salt. Run cold water and let the disposal run for about a minute, then turn it off. Flush the drain with cold water for another 15 seconds. The ice will break into small pieces and combined with the salt will clean the inside of the grind chamber. Throw in lemon wedges after cleaning to provide a fresh, citrus smell.
- Hot soapy water—another method for cleaning the replaces ice cubes. Put the drain stopper in and fill the sink half way with hot, soapy water. Take the stopper out and let the water go down the drain. Before the sink is completely empty, turn on the disposal and cold water. Run both for 2 to 3 minutes. Turn off the disposal but let the cold water run for another 15 seconds. Your grind ring should be clean and work more efficiently.
Garbage Disposal is Clogged, Not Draining
Over time, the impeller plate blades can get stuck. When this happens, waste can clog the sink and water will not drain.
- Use a plunger or bail out the standing water in the sink. Pour excess water into a bucket.
- Clamp off the dishwasher drain line to prevent dirty water from backing up into the disposal.
- Insert an Allen wrench into the access hold at the bottom of the garbage disposal.
- Rotate the blades by turning the hex key back and forth until the clog frees up and the blades move freely.
Garbage Disposal Leaking from the Top
Vibrations from operating the disposal can loosen the mounting flange and leak from the top. Old sealant can also break down and cause a leak from the top. Use these steps to repair this problem:
- Turn off the disposal and unplug or shut off the circuit breaker.
- Examine the disposal under the sink with a flashlight. Check to see if you can find where it’s leaking.
- If the leak is coming from the top, the problem area is at the metal flange inside the drain.
- Remove the disposal mounting ring under the sink by turning it counter-clockwise.
- You can now remove the flange from the top of the sink by loosening the mounting bolts.
- Clean off old plumber’s putty from the top of the flange and put it back into the sink drain opening.
- Tighten the mounting bolts, reinstall the disposal and reconnect the power.
Garbage Disposal is Leaking from the Bottom
A bottom leak is usually caused by a failed seal or crack in the shell of the unit. This can only be fixed by replacing the garbage disposal.
- Turn off the circuit breaker.
- Place a bucket under the disposal to catch water. Turn the connector counterclockwise with an adjustable wrench to loosen it.
- Disconnect the dishwasher hose by loosening the screw holding the clamp. Catch any remaining water from the drain hose with the bucket.
- Use a wrench to remove the top mounting bracket and disconnect the disposal from the sink.
- Remove the bottom cover plate. Unscrew the wire nut connectors from the disposal and pull the wires out.
Things to Consider While Using a Garbage Disposal
Things You Can Put into a Garbage Disposal
Basically, any organic items that can break down into smaller pieces and not stick to the sides of your pipes can be ground in your disposal.
- Fruit and vegetable scraps
- Fruit pits
- Cooked meat
- Corn cobs
- Food scraps
- Small bones
- Ice cubes
Things You Can’t Put into a Garbage Disposal
Items that will solidify or expand and clog your drain should be avoided.
- Shellfish, clam or oyster shells
- Fats, grease or oil
- Fibrous vegetables and peels
- Eggshells
- Rice, pasta, and potatoes
- Corn husks
- Artichokes
- Coffee grounds
- Non-food items
Avoid Using Hot Water When Grinding Food Waste
Hot water can cause problems because it can melt fat. It can stick to the blades and make it more difficult to unclog the drain. You should always use cold water when running the disposal.
Don’t Dump Grease or Fat Down the Drain
Grease, oil and fat should never go into your disposal. Although these products can start out in liquid form, once they cool off and solidify, they can clog the drain and pipes further down the plumbing system. Although some grease will ultimately go into the disposal, make sure to use plenty of cold water to make sure it goes completely through the plumbing system.

Don’t Overfill the Disposal
While it may seem as if your garbage disposal can take just about anything and pulverize it and swiftly send it down the pipe, you need to be careful not to overfill the appliance. Watch how much you put in at a time as well as cut larger items into smaller pieces. This will help reduce the chance of blade jamming or drain clogs.
Never Use Drain Cleaners, Bleach, or Other Chemicals
Harsh cleaning chemicals may help unclog the drain, but there can be lasting damage to both the disposal parts and the pipes. Also, there’s a chance that the chemicals will stick to the blades and risk flying out on the next use.
FAQs
Do you need to clean your disposal?
It’s recommended that you clean your garbage disposal every two weeks to avoid clogs and keep it running at peak performance. Make sure to remove any stuck-on food particles by running ice cubes and a cup of salt through the appliance for about a minute. This will clean food debris off the blades. Kill bacteria and odors with a cup of vinegar and half-cup of baking soda. Use the paste to scrub the flaps and inside of the unit with a small brush (make sure it’s turned off under the sink or at the breaker box.) Add lemon pieces and run the disposal with warm (not hot) water to flush away germs and leave a fresh scent.
What causes a disposal to stop working?
The most common problem related to jams is putting too large of pieces into the appliance. Clearing the jam (unplug the unit first) by removing whatever object is causing the problem. Be safe—never use your fingers to clear the jam; use pliers or tongs instead. It may require moving the impeller assembly with a wrench and resetting the disposal. Ignoring the problem can lead to burning out the motor.
How is a garbage disposal reset?
Disposals have a built-in safety feature that automatically shuts off the unit if it gets jammed, overheats, or some other problem. Most units have a small red, reset button on the bottom. Turn off the disposal and look under the sink for the red button on the underside of the appliance. If it is protruding out a quarter of an inch, press it back in and try running it. If it still doesn’t work, check the circuit breaker to see if it needs to be turned back on.
How to tell if the motor is burned out
If your disposal stops working, you’ll want to check to see if power is getting to the appliance. Unplug the disposal from the electrical outlet under the sink. Test the outlet by plugging a light or small fan in. If it doesn’t work, check the circuit breaker to be sure it hasn’t been tripped. If the breaker is on but nothing works from that outlet, an electrician will need to be called. However, if the test appliance works and the outlet is operating properly, the motor has likely burned out and will have to be replaced.
Can you get a quiet disposal?
Every model has a little different noise level. As with every motorized appliance, there will be some noise due to vibration and motor operation. There are some models that have built-in insulation and anti-vibration features that are much quieter than standard models. Many manufacturers note the decibel level with the specifications, so you can check before you purchase.
Bottom Line
Garbage disposals are an excellent way to rid your home of biodegradable items and reduce the amount of waste you throw in the trash. They make clean-ups faster and are a great kitchen convenience. As long as you follow the guidelines for what you should and shouldn’t put down the disposal, clean the unit regularly, and handle jams or clogs quickly, your simple appliance should be trouble-free for years.
 DIY Not Your Thing? Puls is Here to Help
Not everyone is able or wants to repair their own appliances and that’s okay. Puls has the experts and the know-how to fix your garbage disposal quickly and painlessly. Our skilled technicians can troubleshoot, diagnose and repair all makes and models of appliances, including your disposal.
With easy, online booking, our specialist will arrive at a time that’s convenient for you. Same-day appointments are even available. Our 90-day guarantee on parts and labor will provide peace of mind so you know your appliance will be fixed right. Need a new garbage disposal? We can help with that too. Our fully vetted specialists can recommend and install the disposal that’s right for you.
Get a Puls’ Appliance Protection and all your kitchen appliances including your garbage disposal are protected. A Puls+ Whole Home Warranty will protect all your major appliances including your garbage disposal and home systems (including HVAC, plumbing, electrical and more.)
Don’t waste another moment worrying about unexpected garbage disposal breakdowns, call or click today to sign up for a Puls Appliance Protection plan.